WhatsApp Integration
How to connect WhatsApp Business with Answerly
Hey there! 🙋♀️
Are you looking to connect your WhatsApp to your AI agent? Well, you are at the right place. I'll walk you through the process step by step.
Before you start, please ensure you have a WhatsApp phone number and a WhatsApp Business account set up via the Facebook Developer dashboard. Answerly assumes this setup is already in place.
Step 1
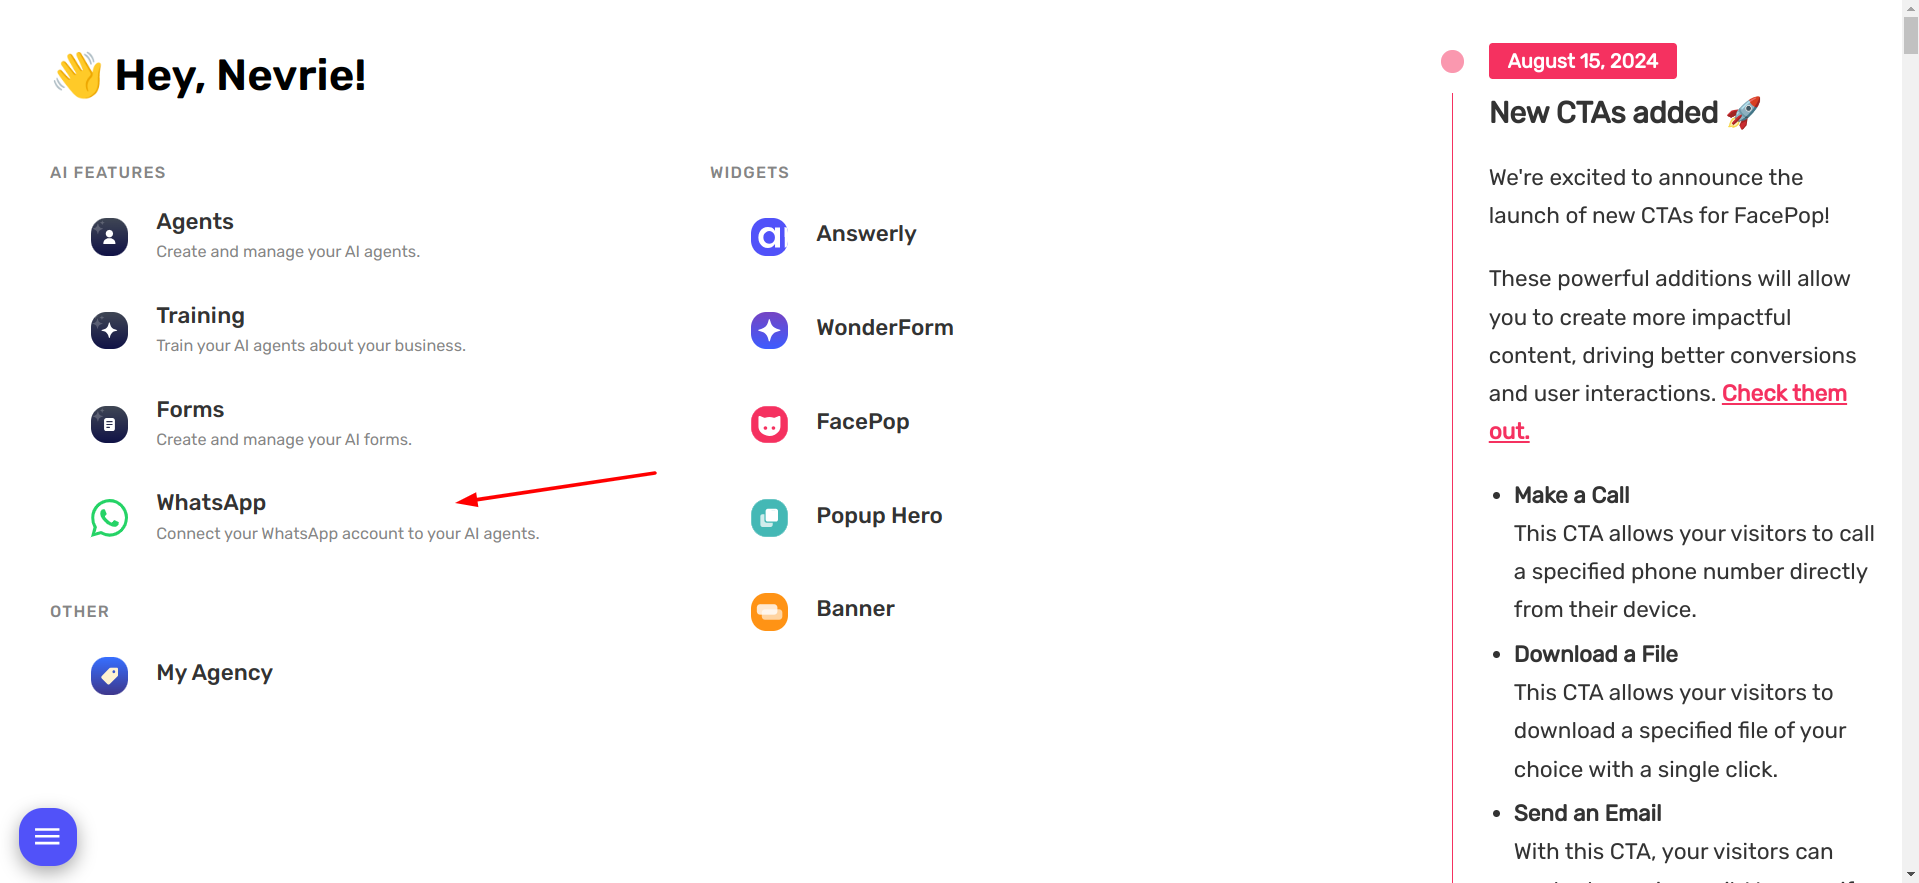
The starting point is to Login to your Answerly account & once you're on the homepage, navigate and click on WhatsApp.
Step 2
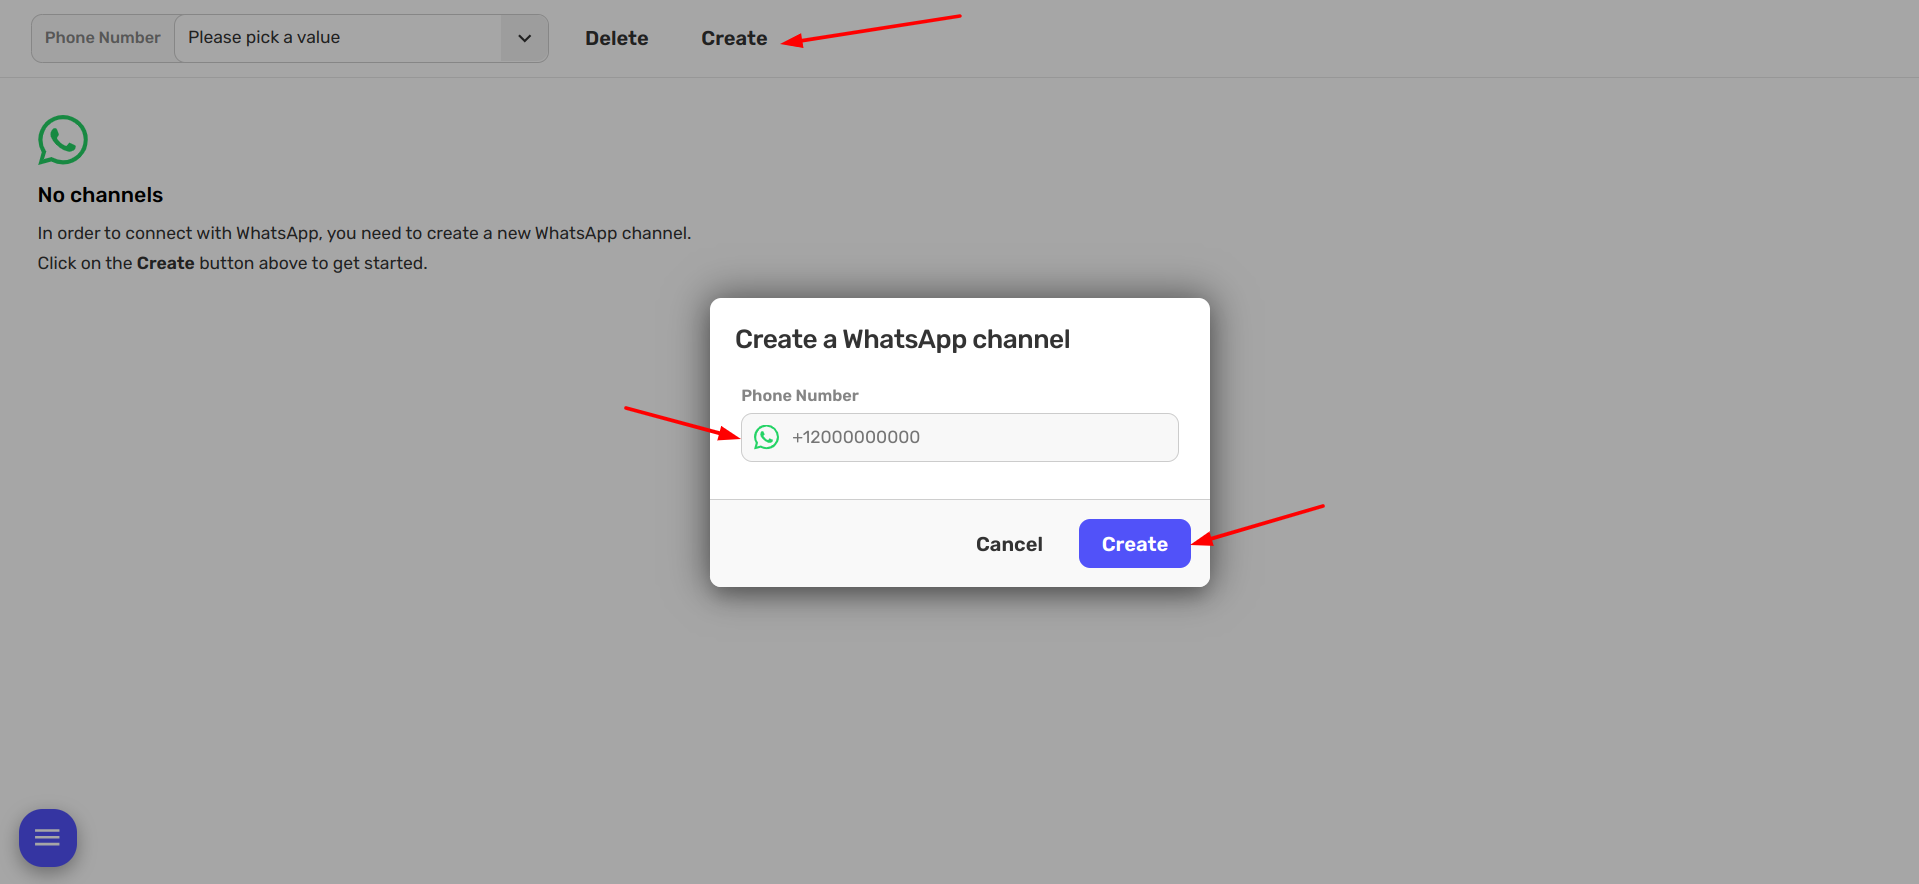
If you have not added your WhatsApp account yet, you'll find an inviting Create button. Simply click on it, and insert your WhatsApp phone number.
Step 3
After connecting your phone number, it's time to choose the agent you want to connect with your WhatsApp account.
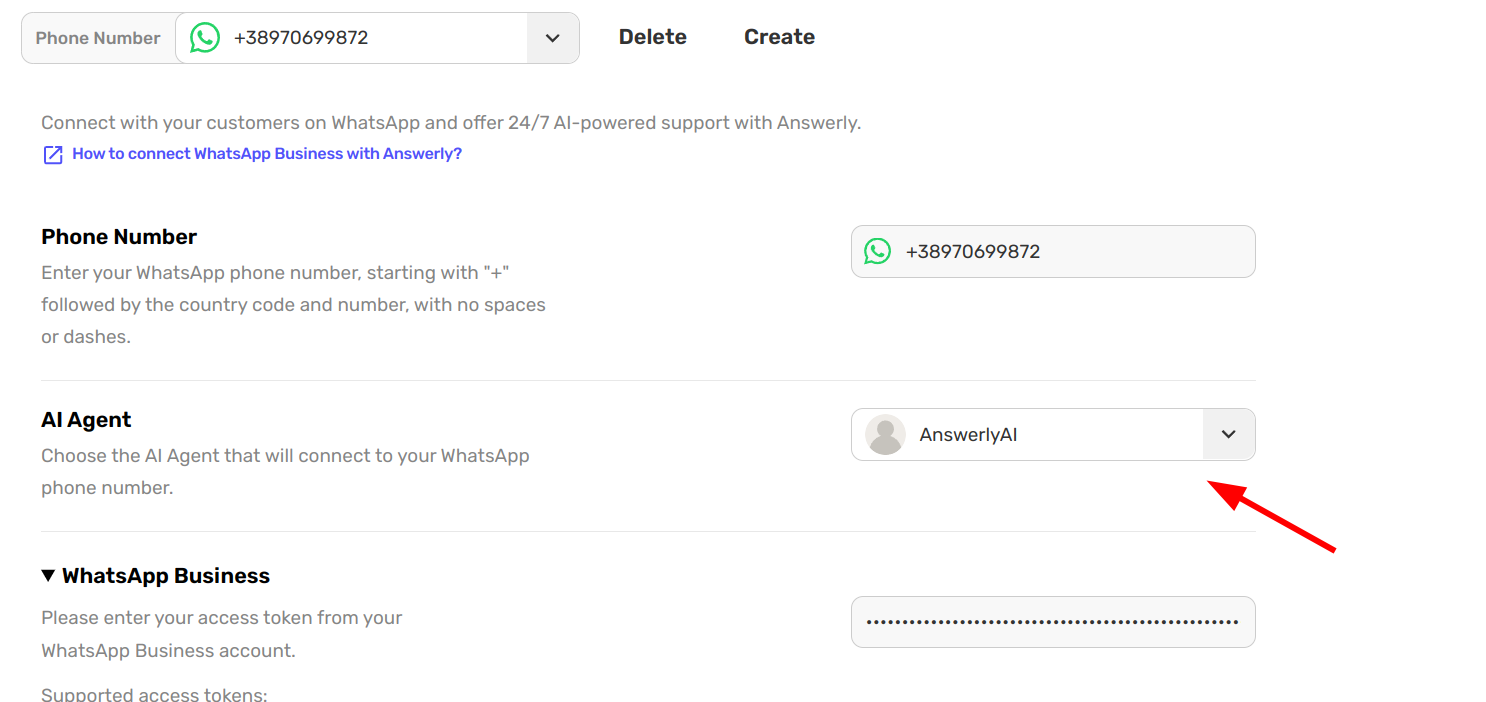
The agent is your Personal AI assistant who will commune with your users. If you haven't created an agent yet, no worries, here's a quick guide to help you create and train one.
Step 4
Now, let's set up your WhatsApp API info. We need your Access Token to connect your WhatsApp account to Answerly.
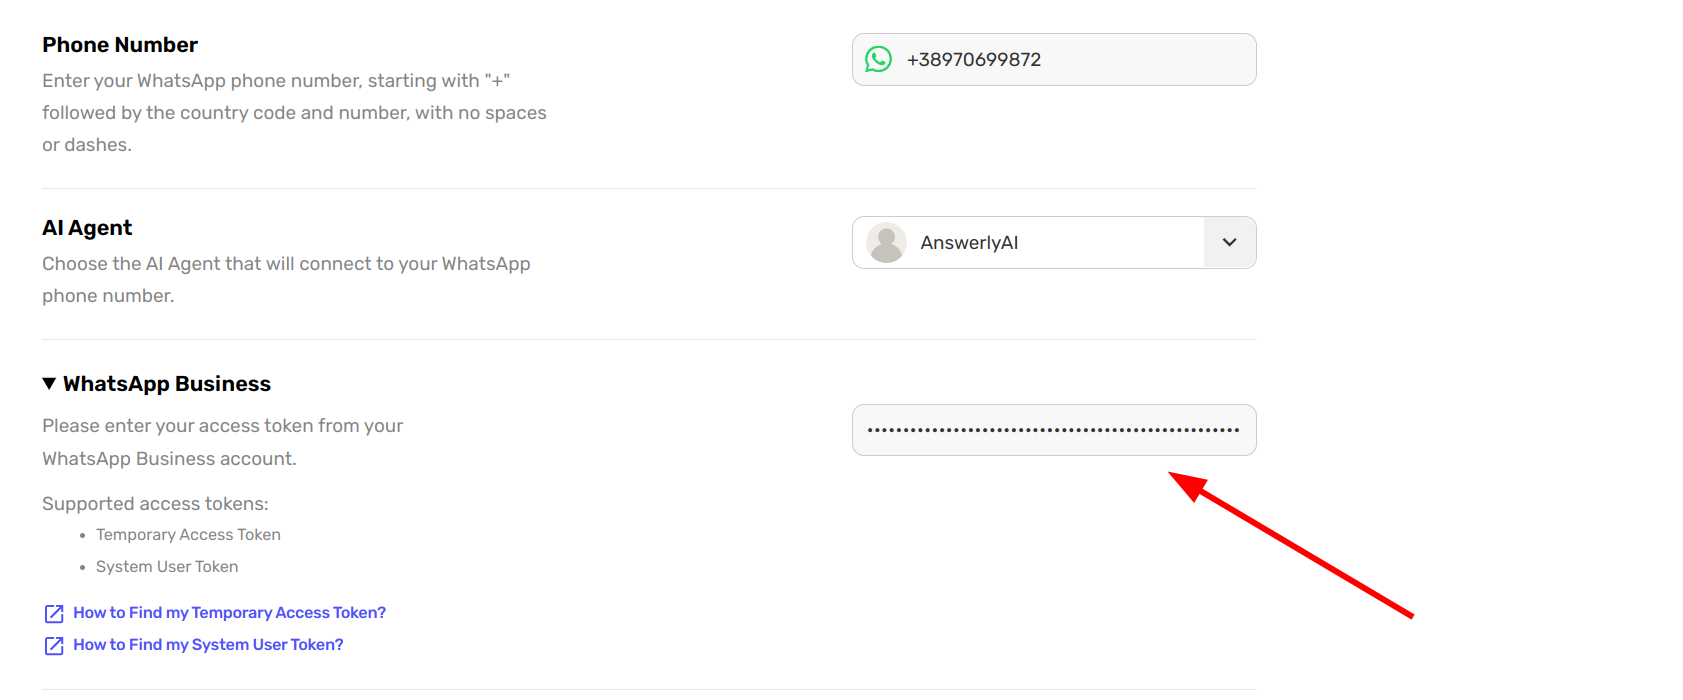
You can either provide a system user token, or a temporary token. We have guides for both:
Step 5
Final step! You need to set up webhooks so that Answerly can receive messages from your WhatsApp account.
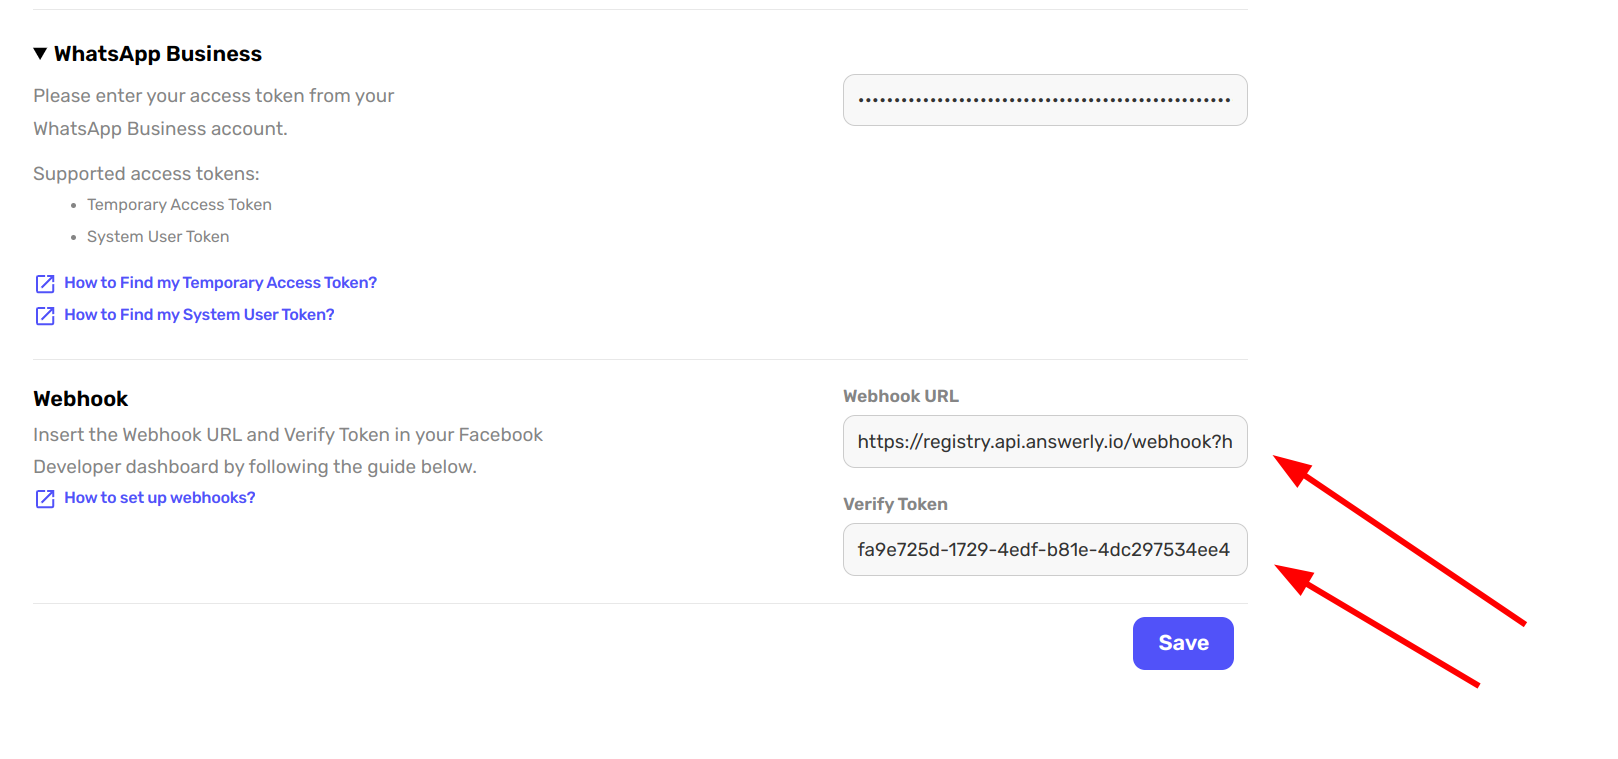
5.1) Copy the Webhook URL and Verify Token from the WhatsApp setup page inside Answerly, and go to your Facebook Developer dashboard -> Webhooks section.
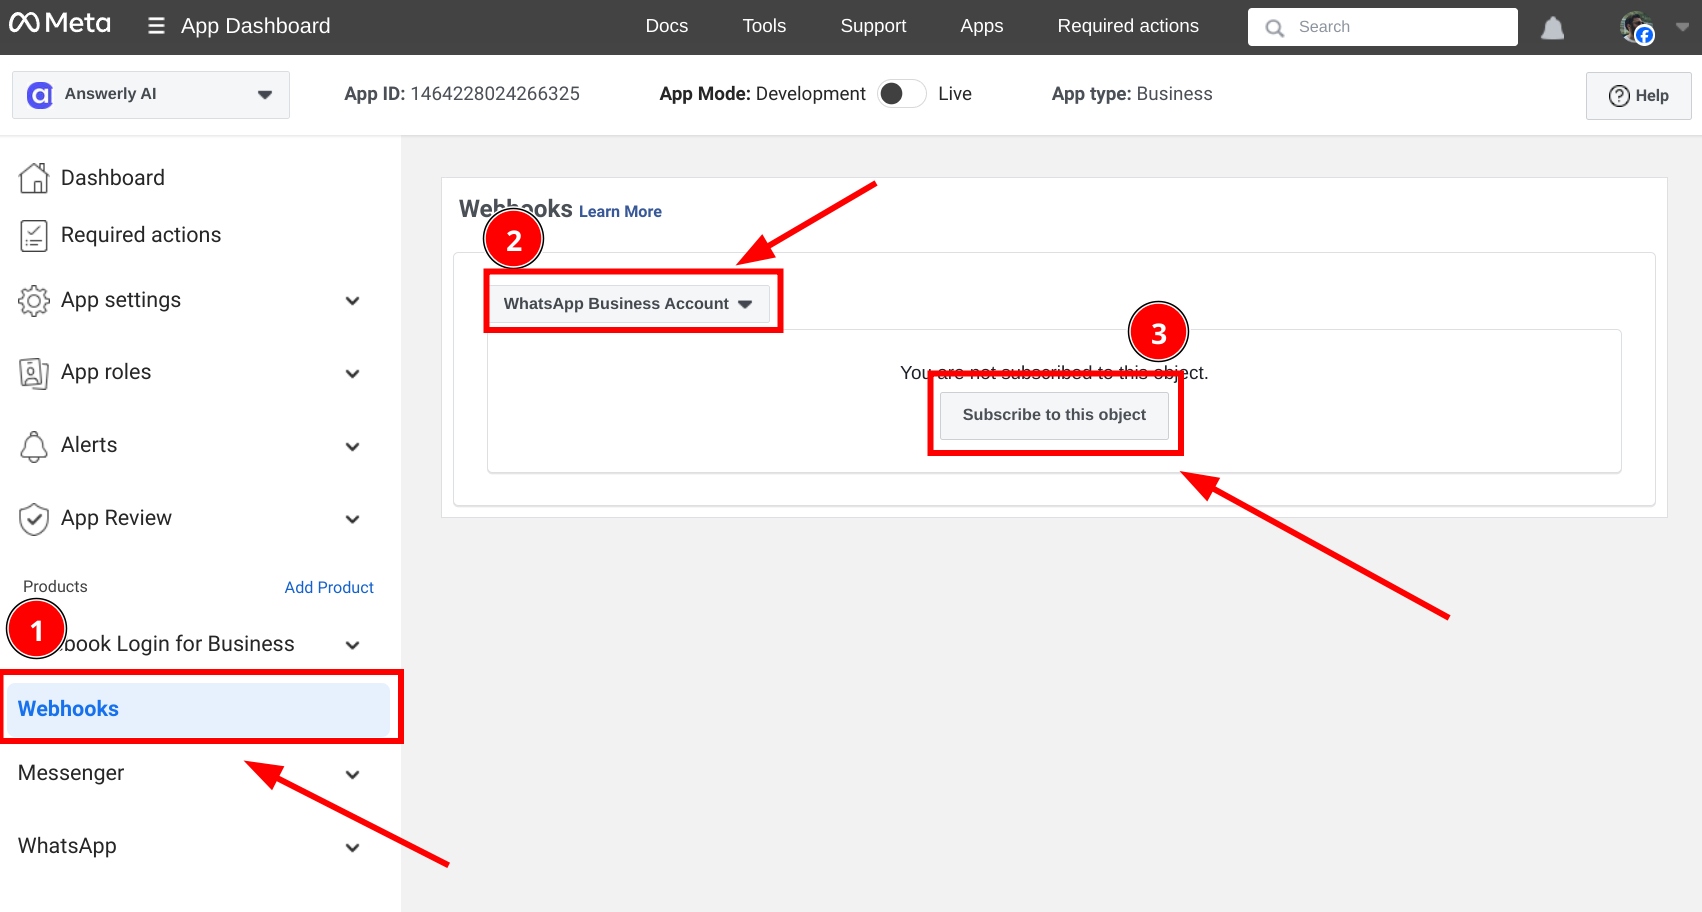
5.2) In the Webhooks section (fig1), select WhatsApp Business Account from the
dropdown (fig2), and click Subscribe to this Object (fig3)
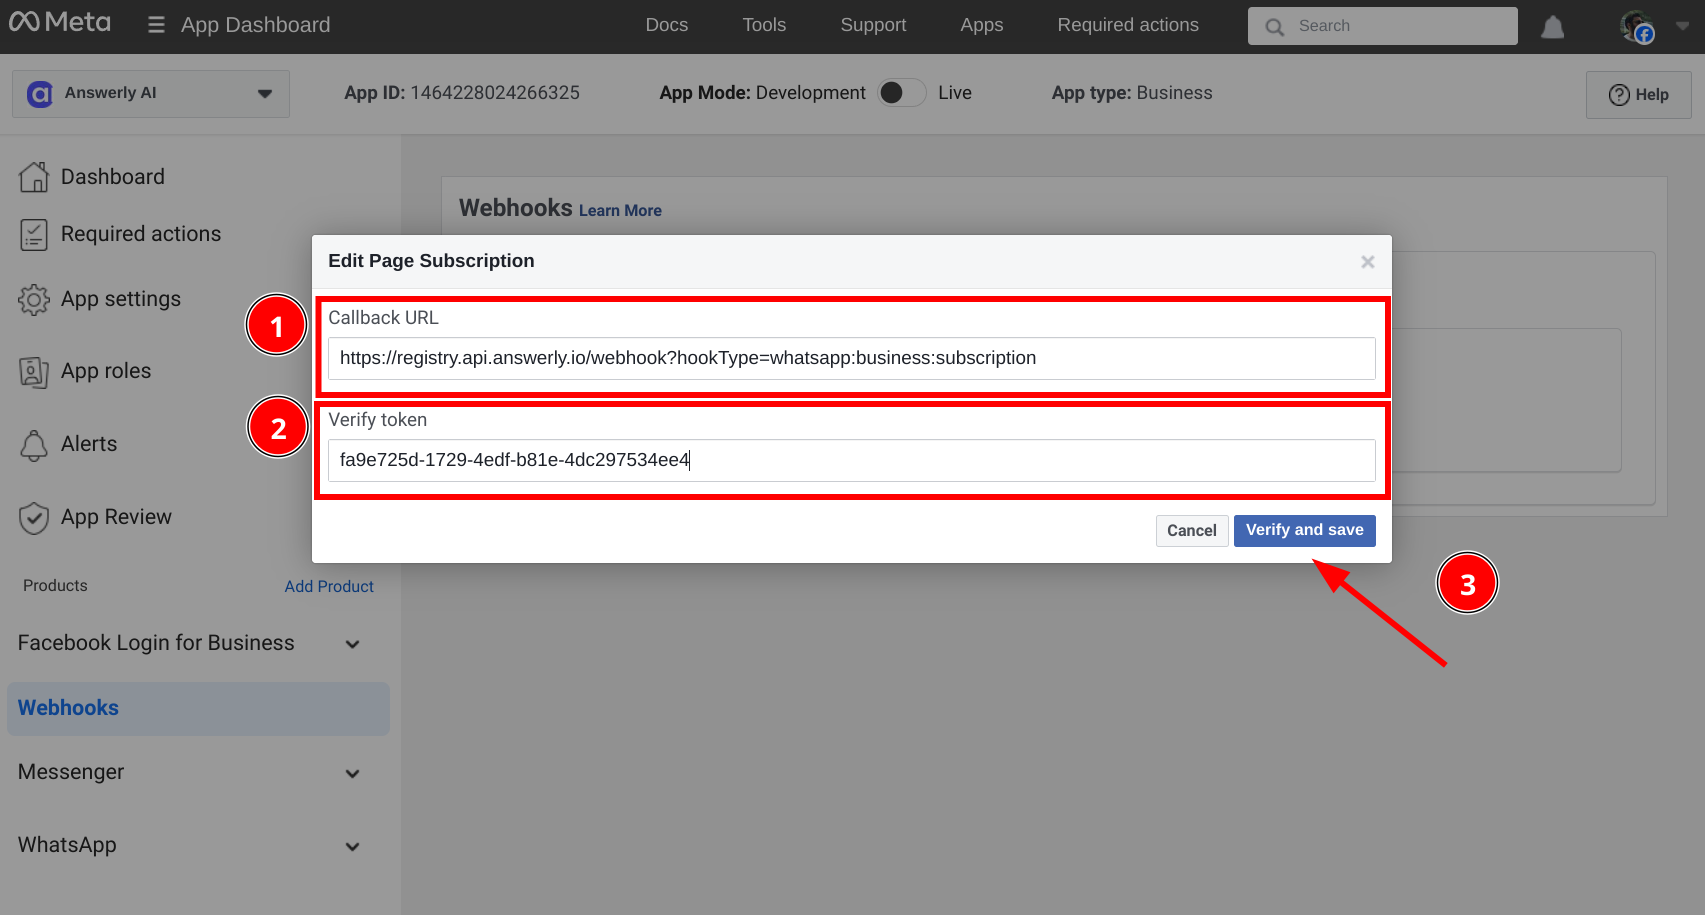
5.3) Then, a popup will appear where you can paste the Webhook URL and Verify Token, fill in and click Verify and Save.
Done! Your WhatsApp account is now connected to Answerly. 🎉
Don't forget to save your changes at Answerly as well! Happy bot-ing! 🚀

