Facebook Pages
How to Connect My Facebook Page with Answerly
Hey there! 🙋♀️👋
So you'd like to connect your Facebook page to Answerly's smart AI agents - fantastic choice! This will allow you to easily manage and streamline your Facebook conversations. Here's a step-by-step guide to show you how to do just that!
Before we start, make sure you're the admin of the Facebook page you want to connect - it's crucial for a smooth integration process.
1) How to Connect My Facebook Page with Answerly?
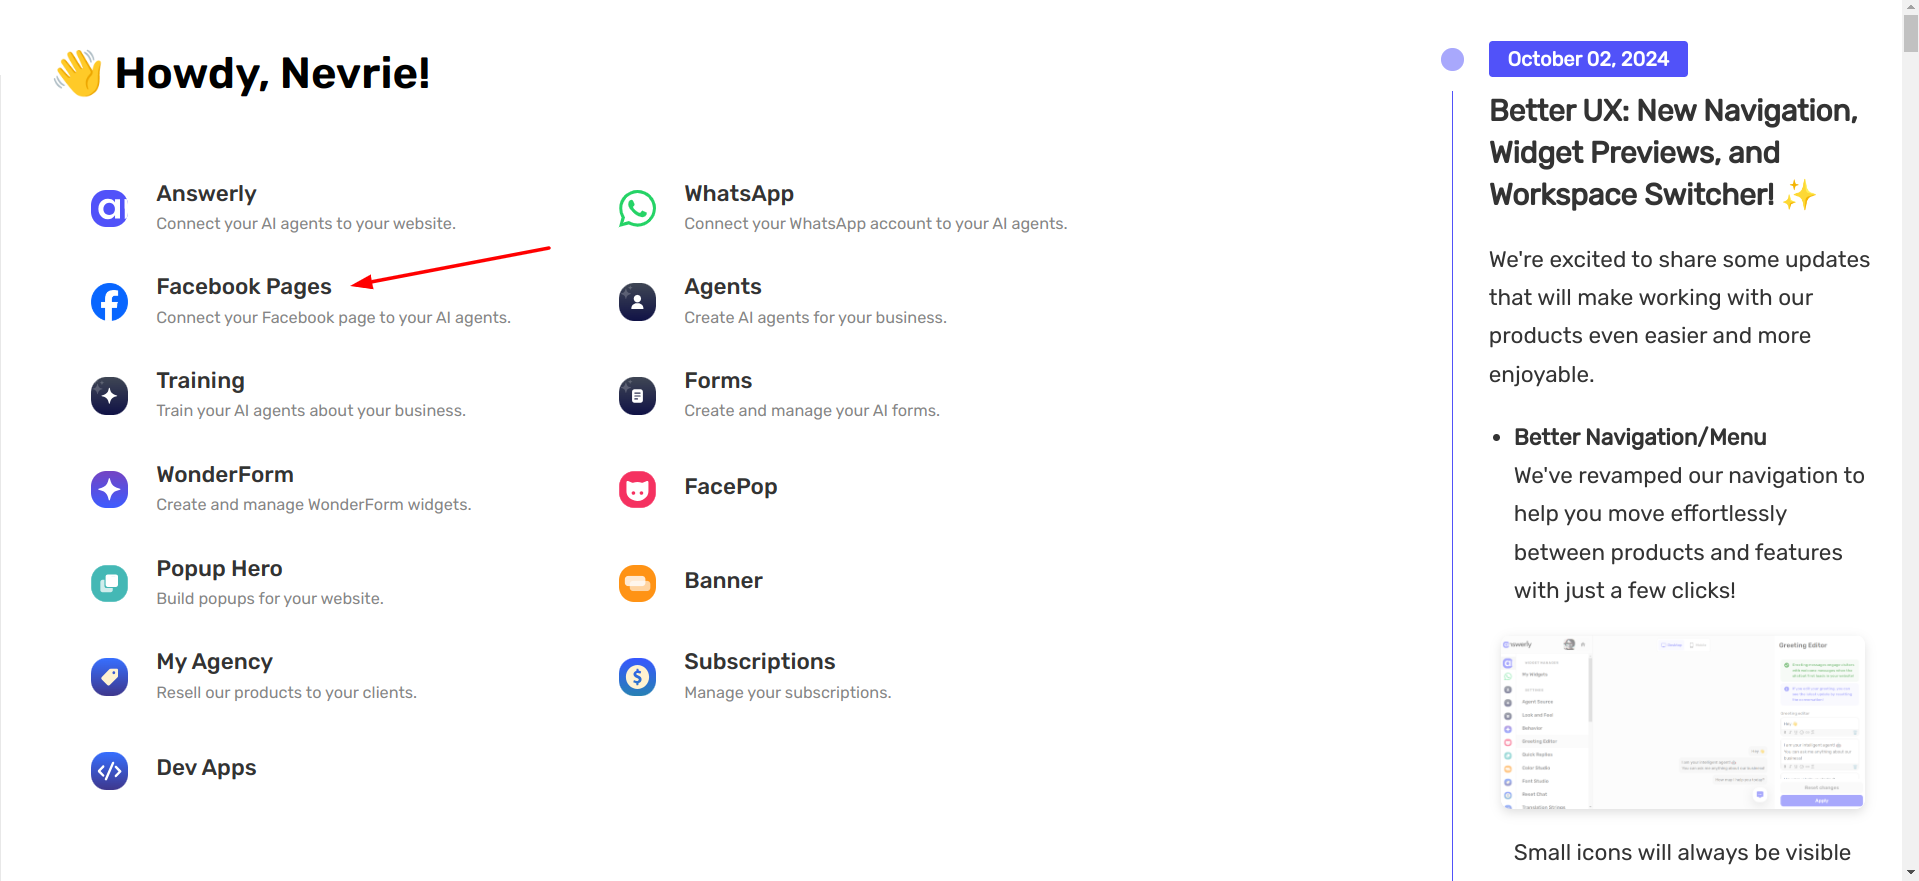
First things first, you'll need to log into your Answerly account. Once you've logged in, find and click on the Facebook Pages section on the homepage.
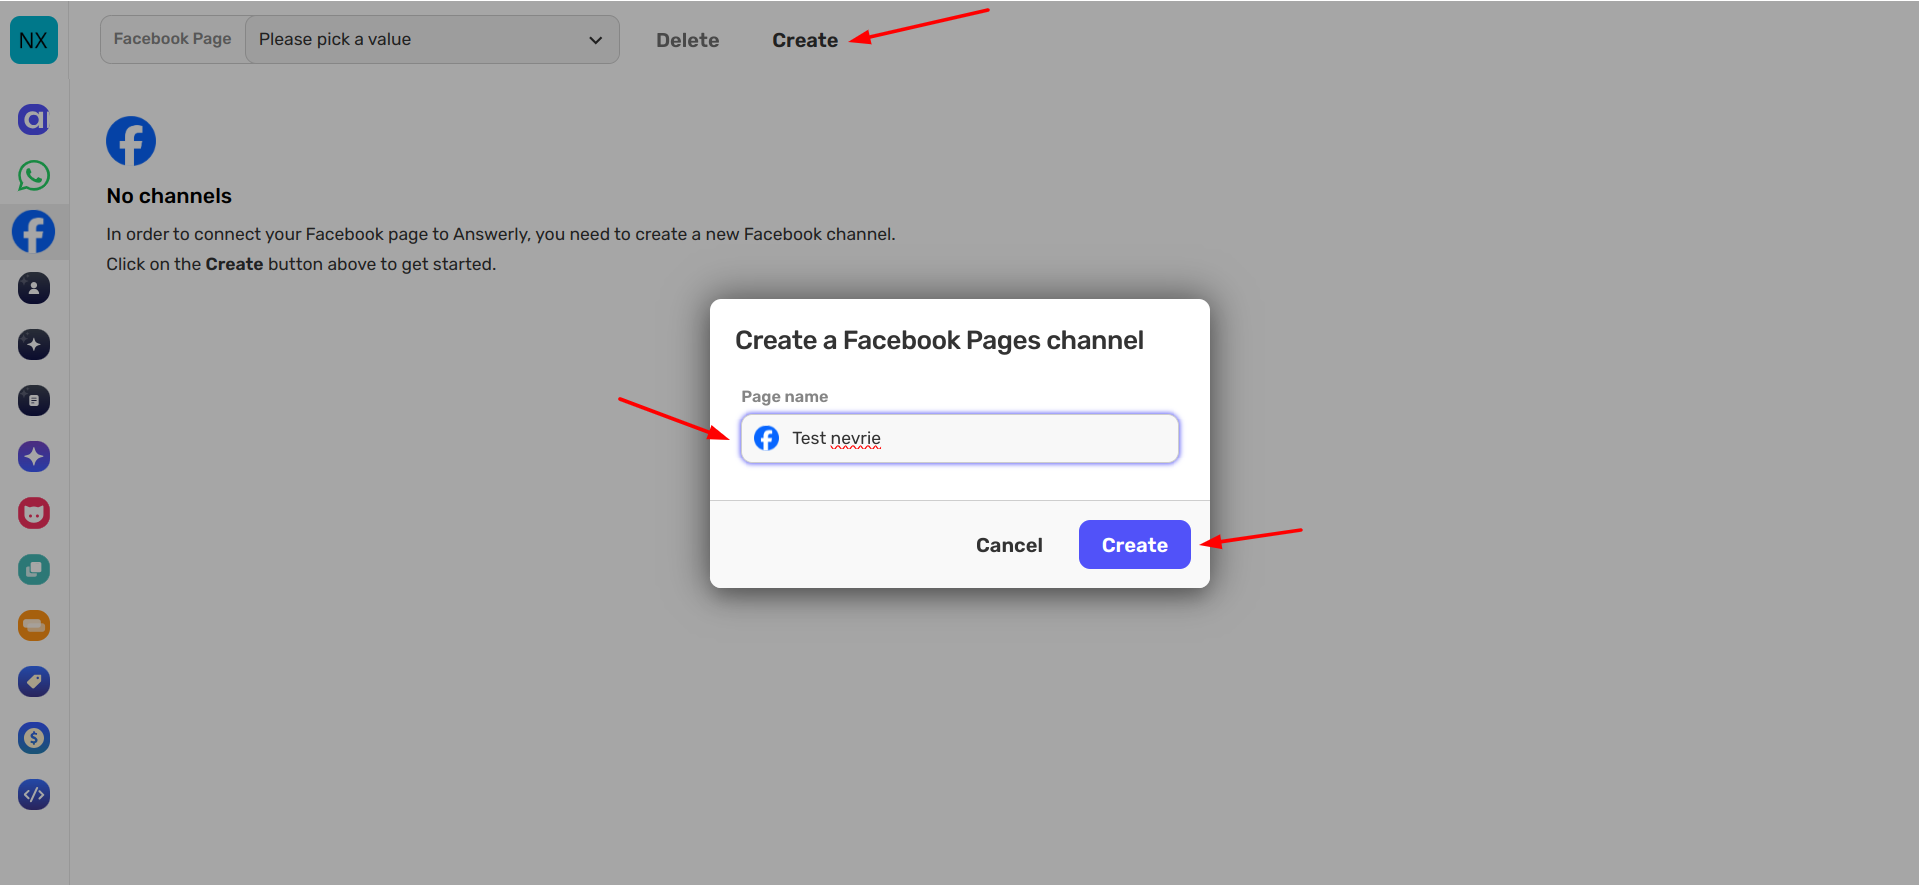
To create a new Facebook page channel, click Create, enter your Facebook page name, and then click Create again.
Now that you've created your channel, you need to enter your Facebook page ID. If you're not sure how to find this, you can follow this detailed guide: How to find my Facebook page ID?.
Next up: associate your new channel with an agent. Simply select an existing agent from the dropdown. We've got to create a Facebook Developer App next, but don't worry - I'll walk you through it!
2) Create a Developer App
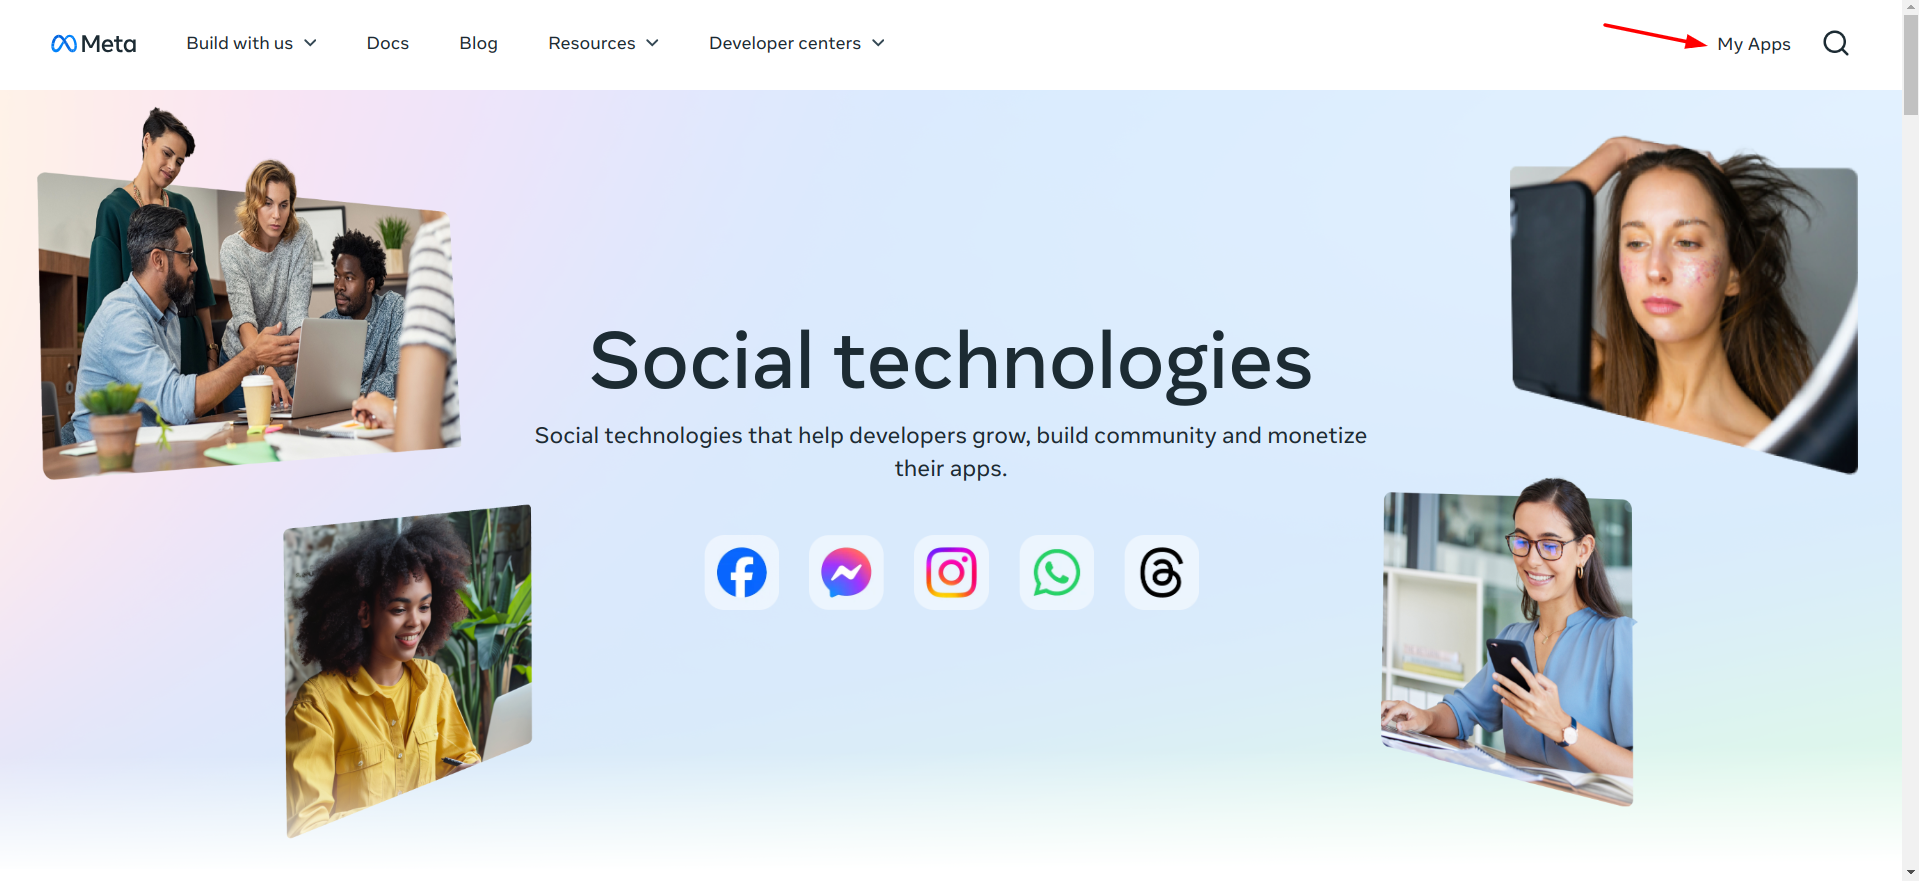
Now, head over to the Facebook Developers' Portal. Click on My Apps and then Create App.

You will need to fill out some details like the app name, contact email, and the app's purpose. It's important to choose Business as your app's type. Then, click Create App and you'll be taken to your new app's dashboard.
3) Enable Messenger as a Product
In this step, you'll need to enable Messenger as a product of your Facebook app. Find Messenger and click Set Up.

Facebook will guide you to integrate Messenger with your app, and this will allow your Answerly bot to send and receive messages via Messenger. Neat, right?
4) Configure Webhooks with Correct Permissions
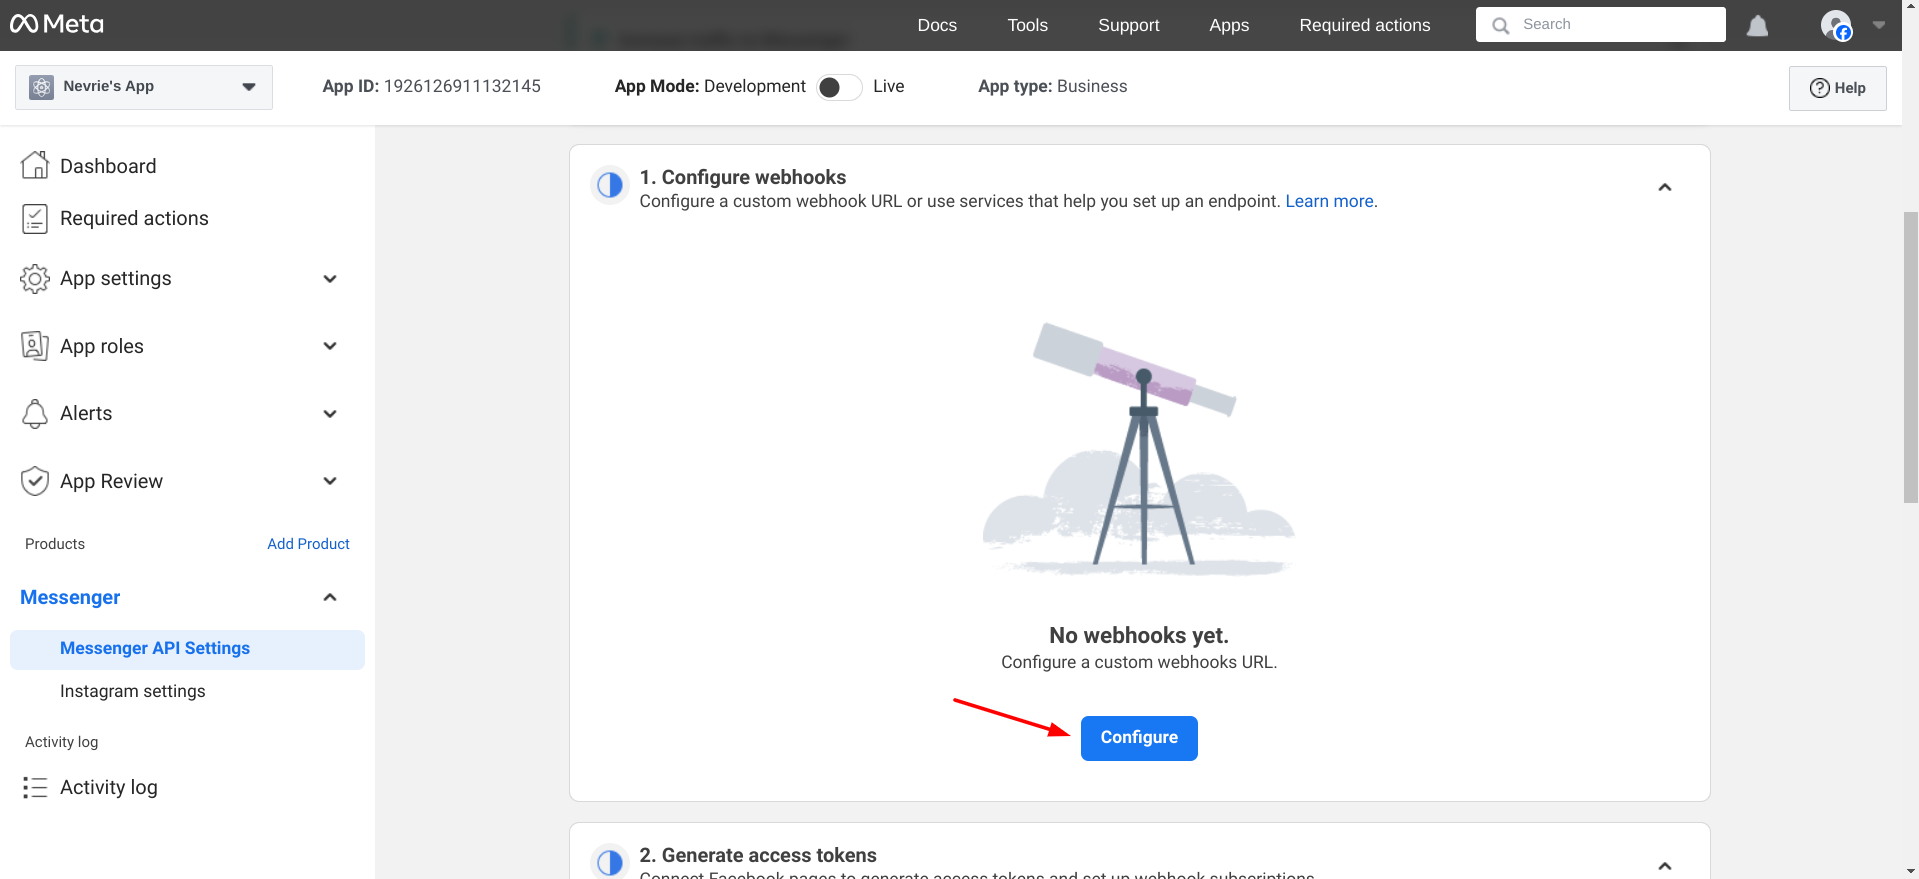
Webhooks are critical for facilitating seamless communication between your app and Facebook Messenger. Within your Developer app, find the Webhooks section under the Messenger settings and click Configure.
In the webhooks section, take note of the Callback URL and Verify Token details provided by Answerly,
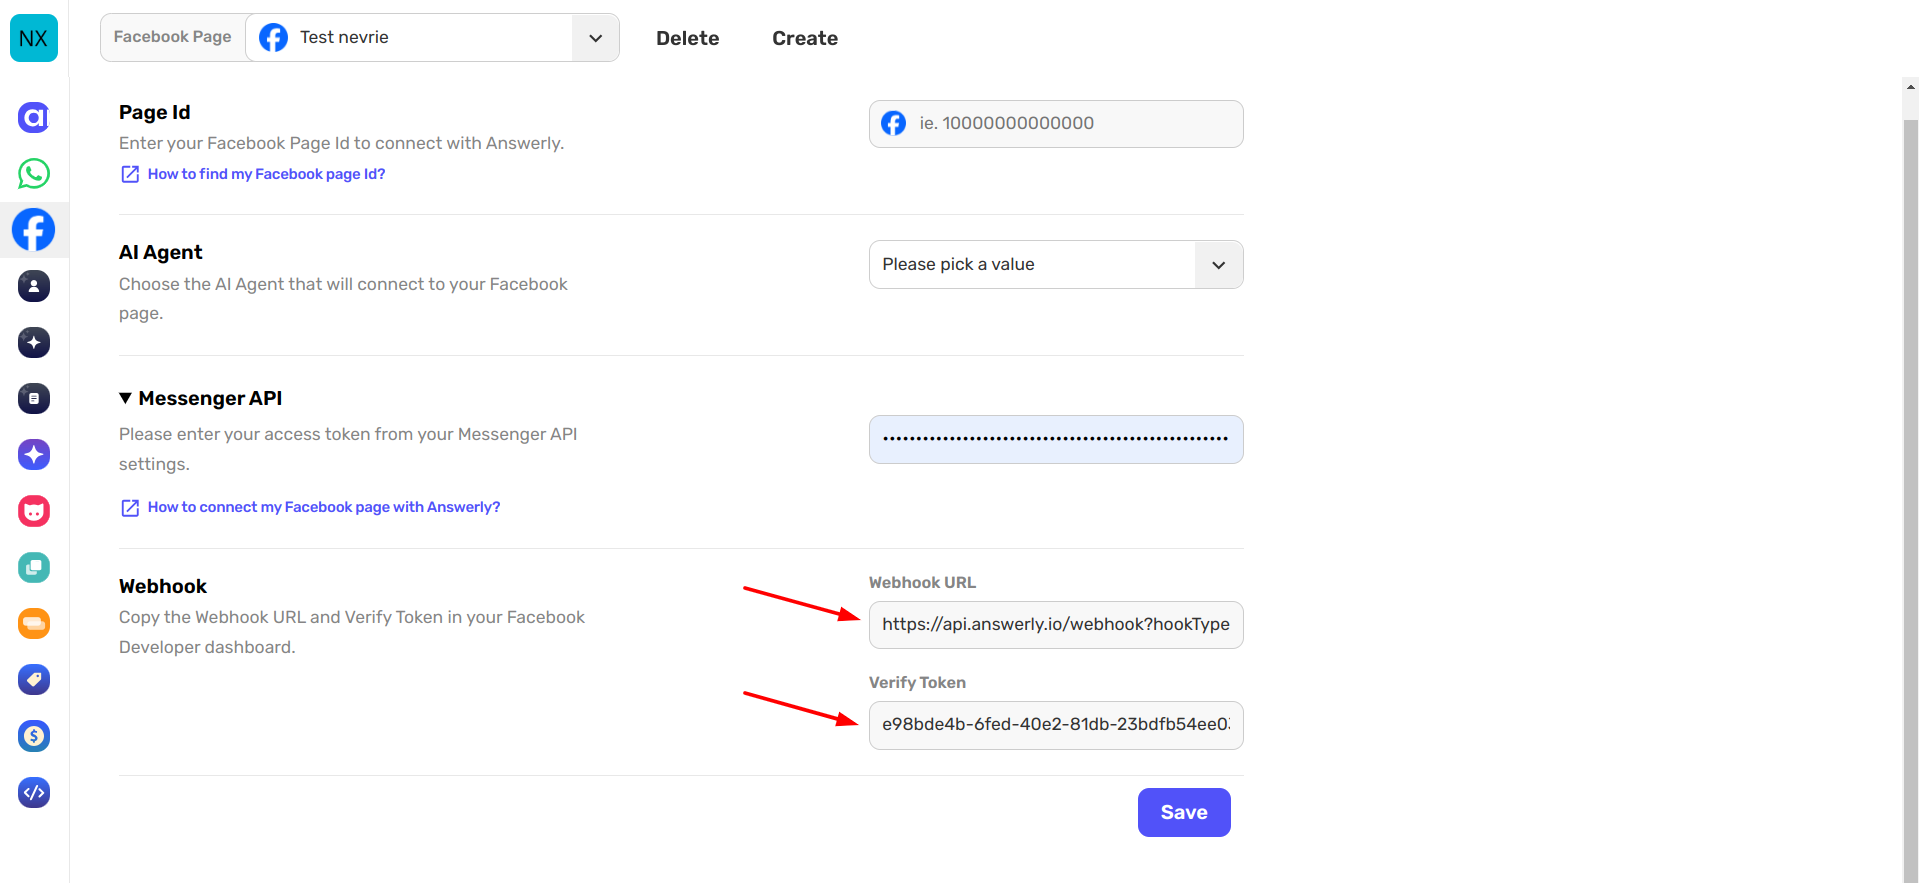
and input them in the corresponding fields in the Facebook Developer App. Once you're done, click Verify and save.
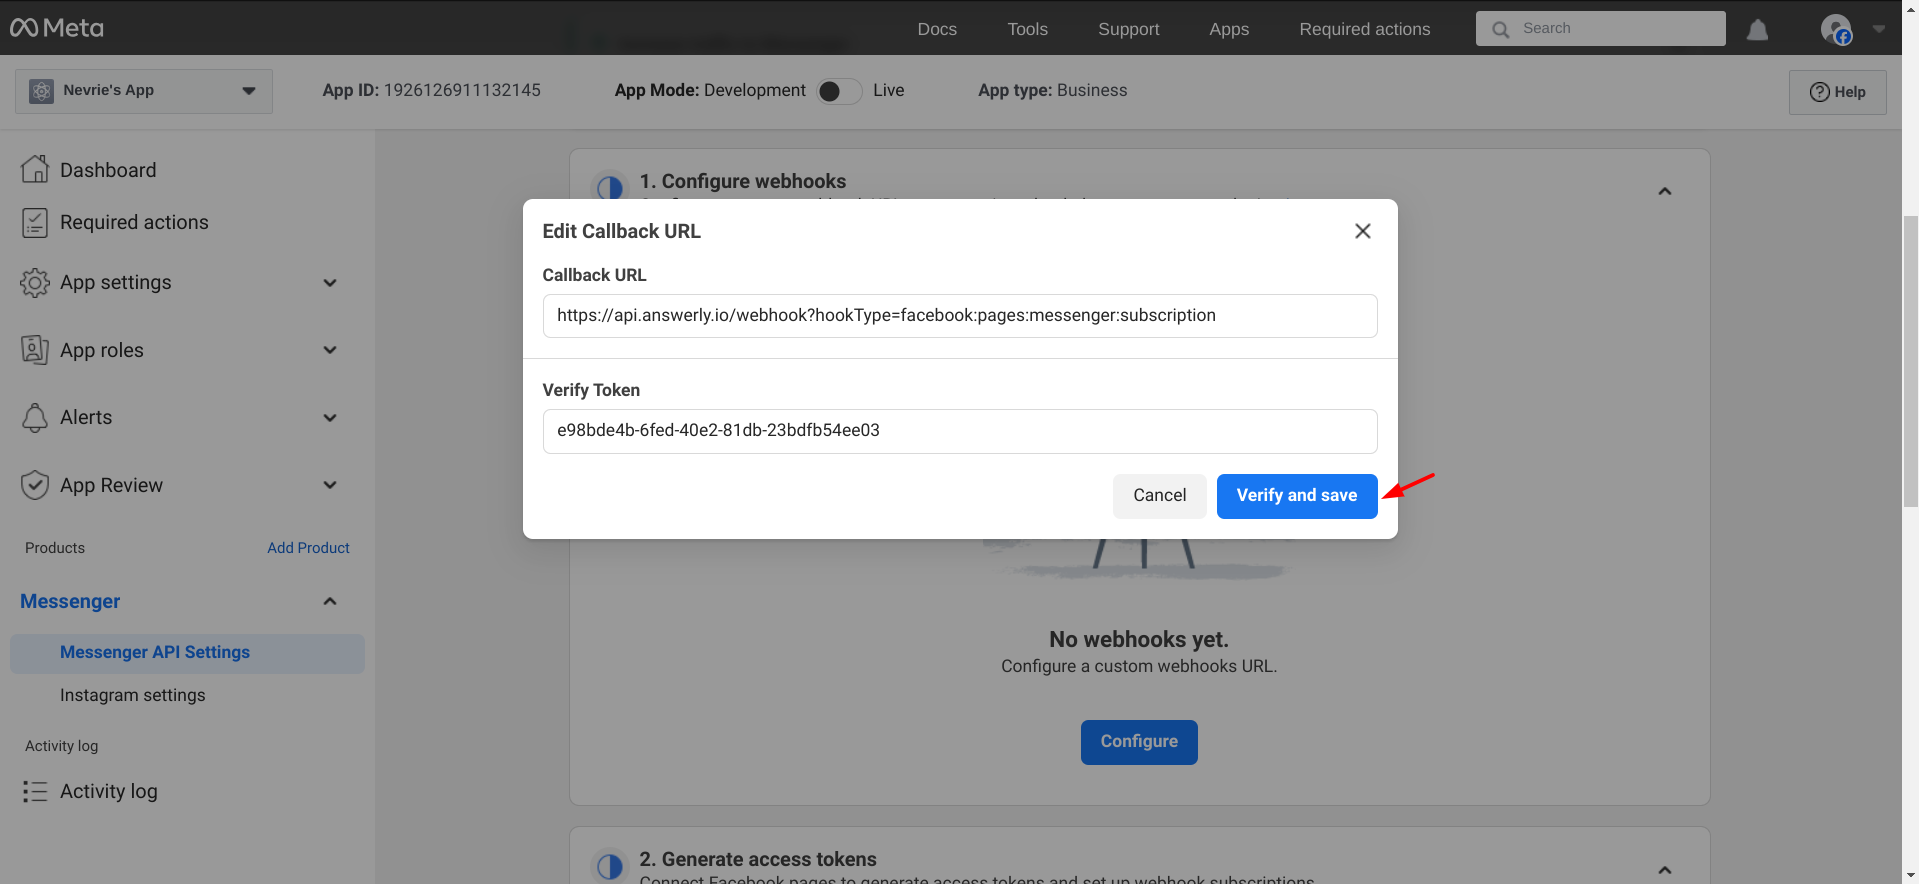
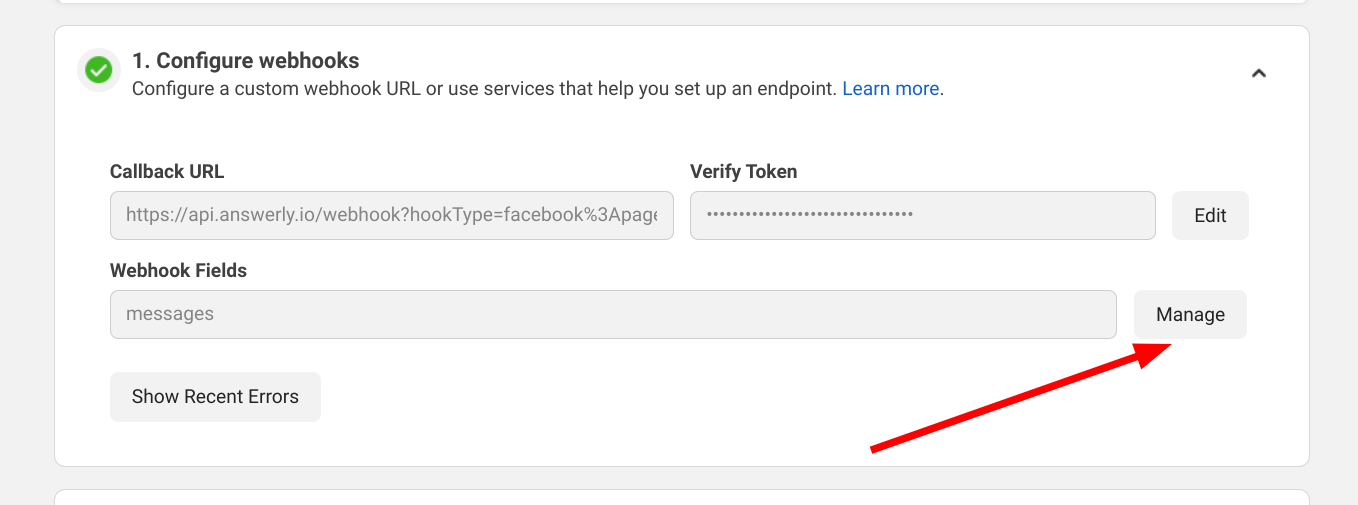
After the webhook is verified, you have to subscribe to the messages field.
Click on Manage as seen in the image below.
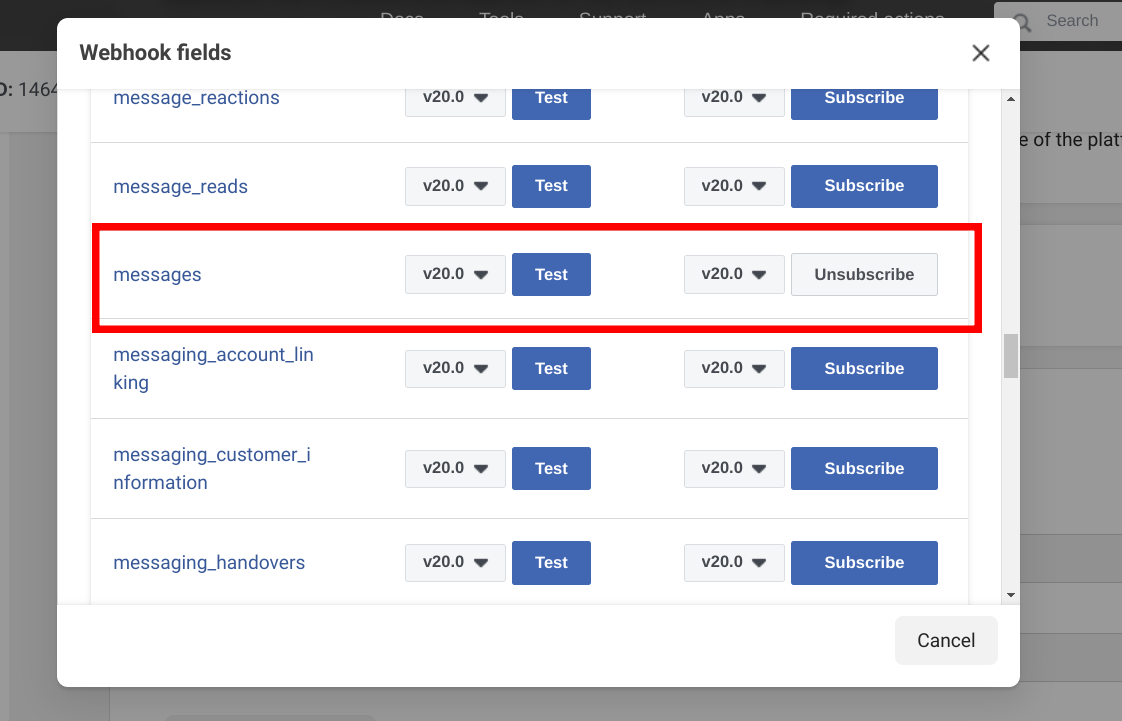
And in the new popup, scroll down until you find the messages field. Click on the Subscribe button.
5) Generate Access Token
Here's where things get a little bit interesting. The access token is vital as it allows Answerly to communicate with your Facebook page. Within the Messenger settings of your Developer app, scroll down to Token Generation and click *Get Started.

Select your Facebook page, click Generate, and voila! Copy this token.

You'll need the token to integrate Facebook with Answerly - so keep it safe!
6) Put Your App Live
After you have everything set up, it's time to put the app live. Navigate to App Review in the Facebook Developer Dashboard. Facebook will review your app to ensure compliance with their policies (usually takes around 5 days for the app to be reviewed by Meta).
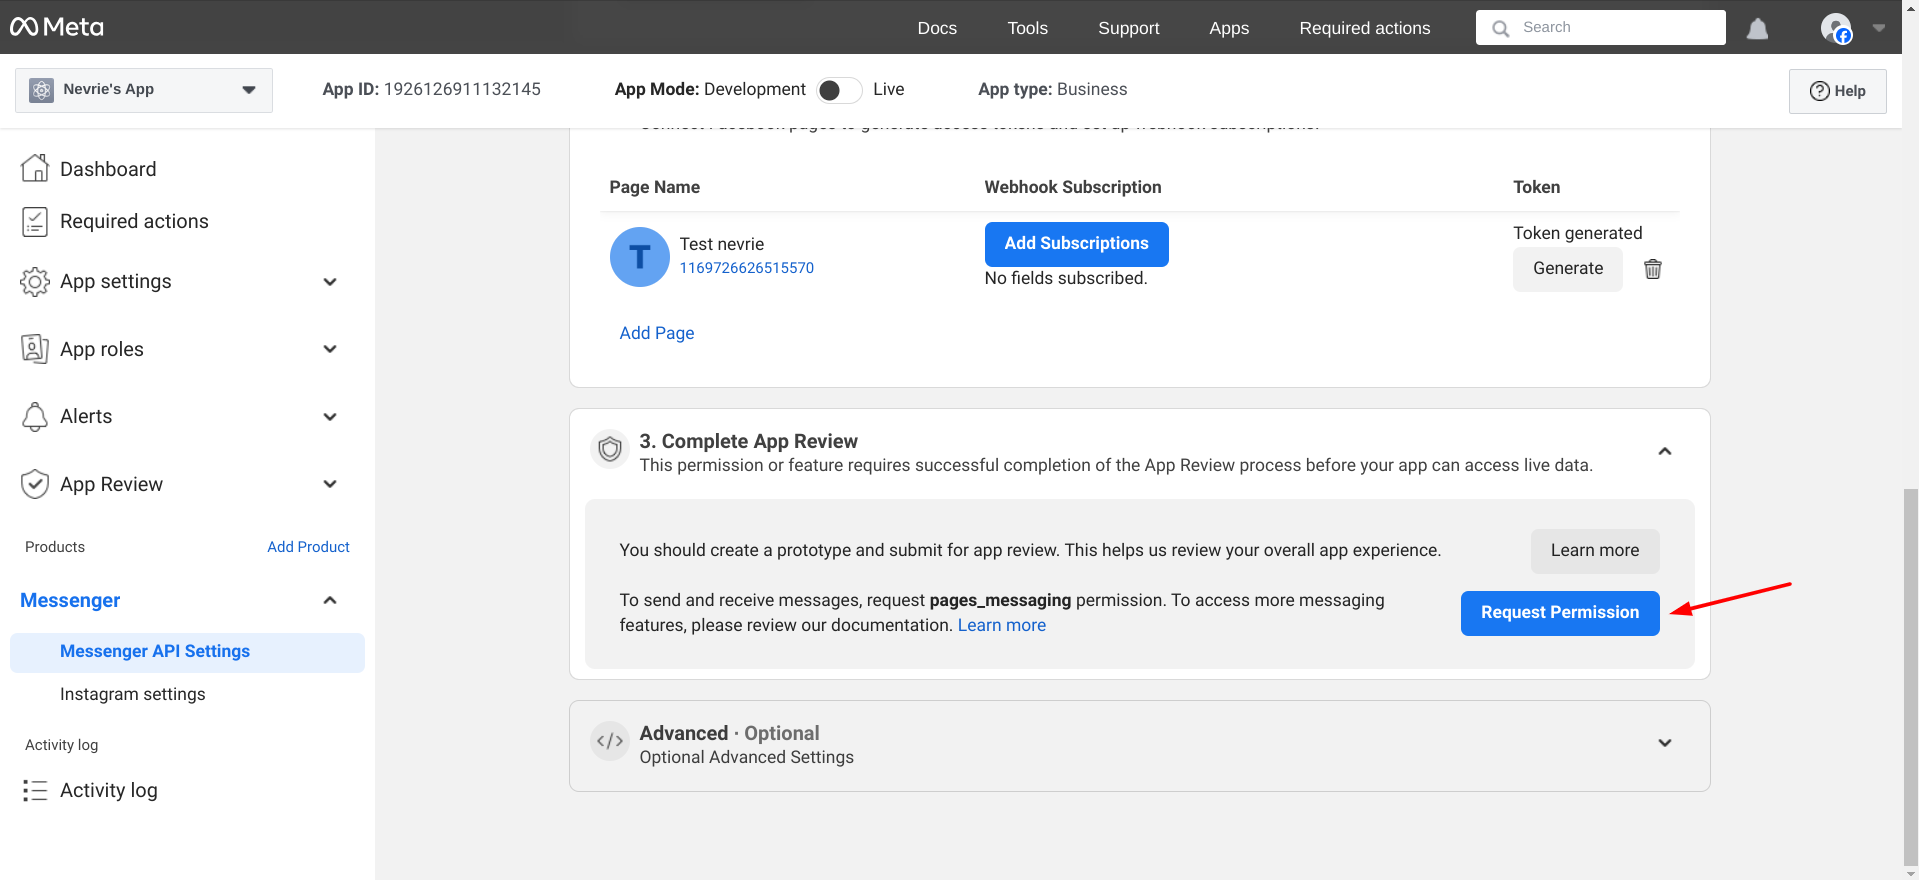
Once you get the green light from them, activate your app by toggling the Live switch.
Your app is now live! This means your Answerly chatbot can now communicate with your Facebook Messenger audience. Amazing, isn't it?
7) Set Up Facebook Channel in Answerly
Now, let's turn our attention back to Answerly. Go to the Facebook Pages section in your dashboard. Paste the access token you've just generated into the appropriate field.
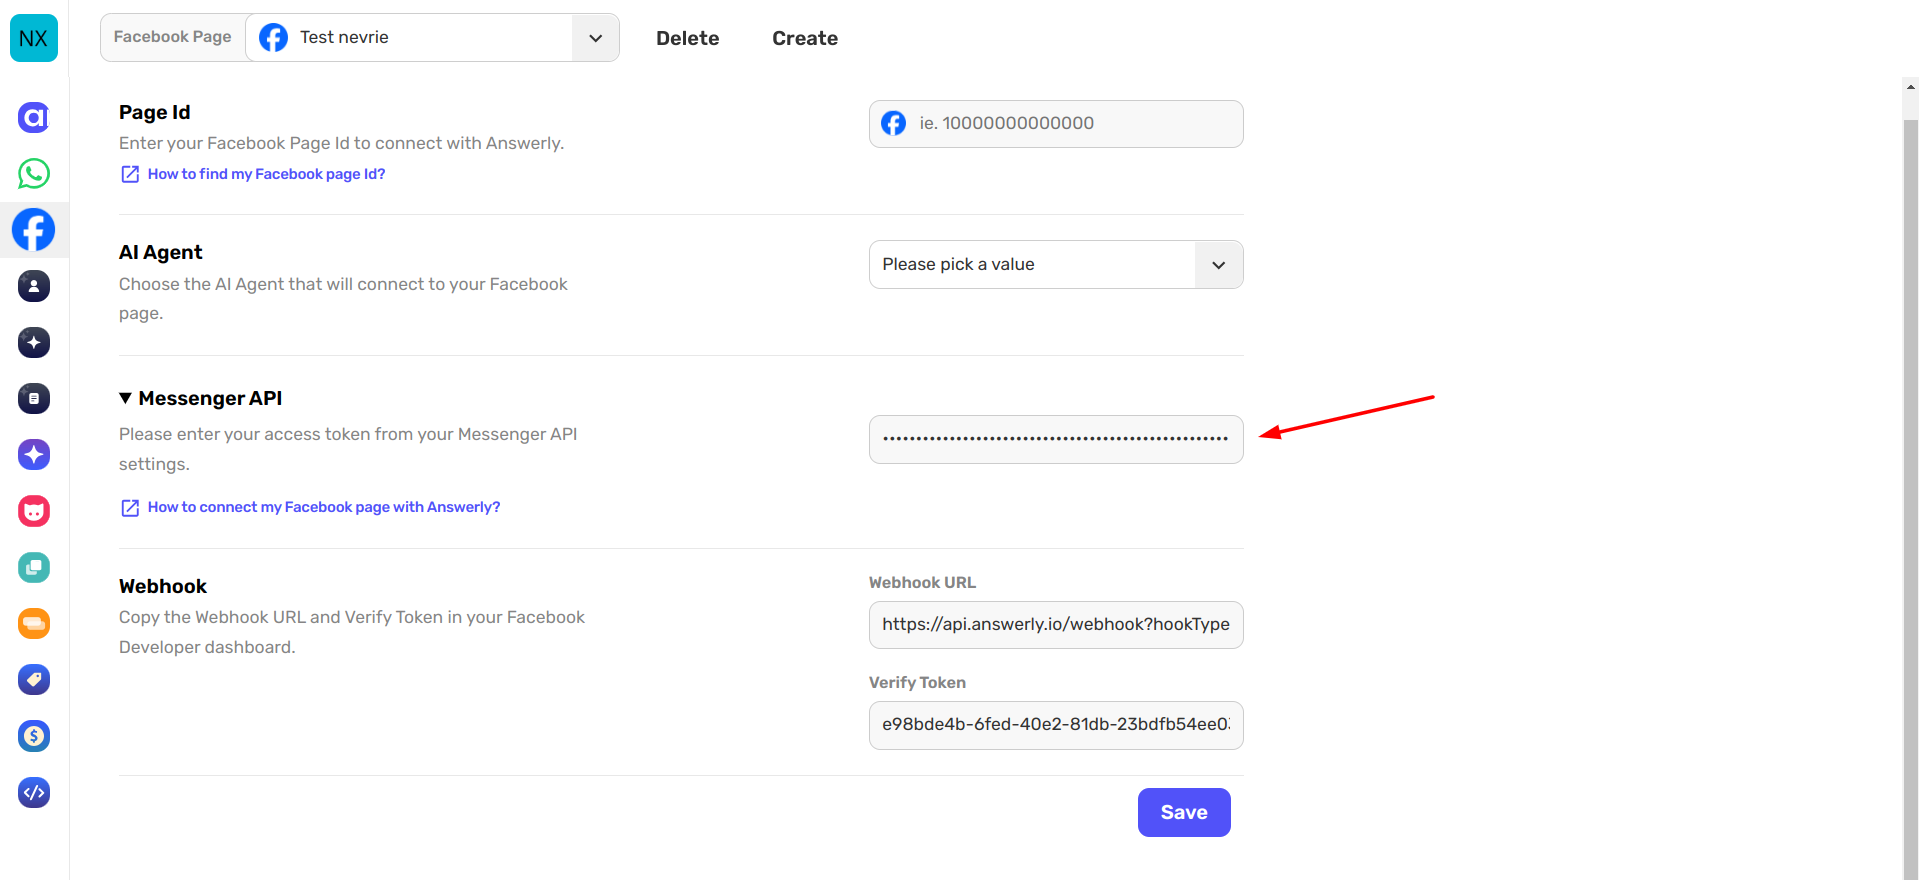
Last step: confirm the connection and put your chatbot to the test by sending a message to your Facebook page.
There you go! Get ready to engage with your Facebook page audience through Messenger using your Answerly AI chatbot. 🥳
If you need help with anything else, don't hesitate to ask at hi@answerly.io. 😊

