Integrations
Embed Your AI Agent in Webflow

Adding your Answerly AI agent to your Webflow project takes less than two minutes.
Because Answerly handles layout constraints seamlessly, you don't need to configure complex interactions inside the designer, just drop the script snippet into your global custom code settings.
Here is the step-by-step guide to embedding your AI agent on Webflow.
1. Copy Your Embed Snippet
Before heading to Webflow, you need to grab your unique widget code from the Answerly dashboard.
Go to the Instant Embed page, and click on Connect a Website:
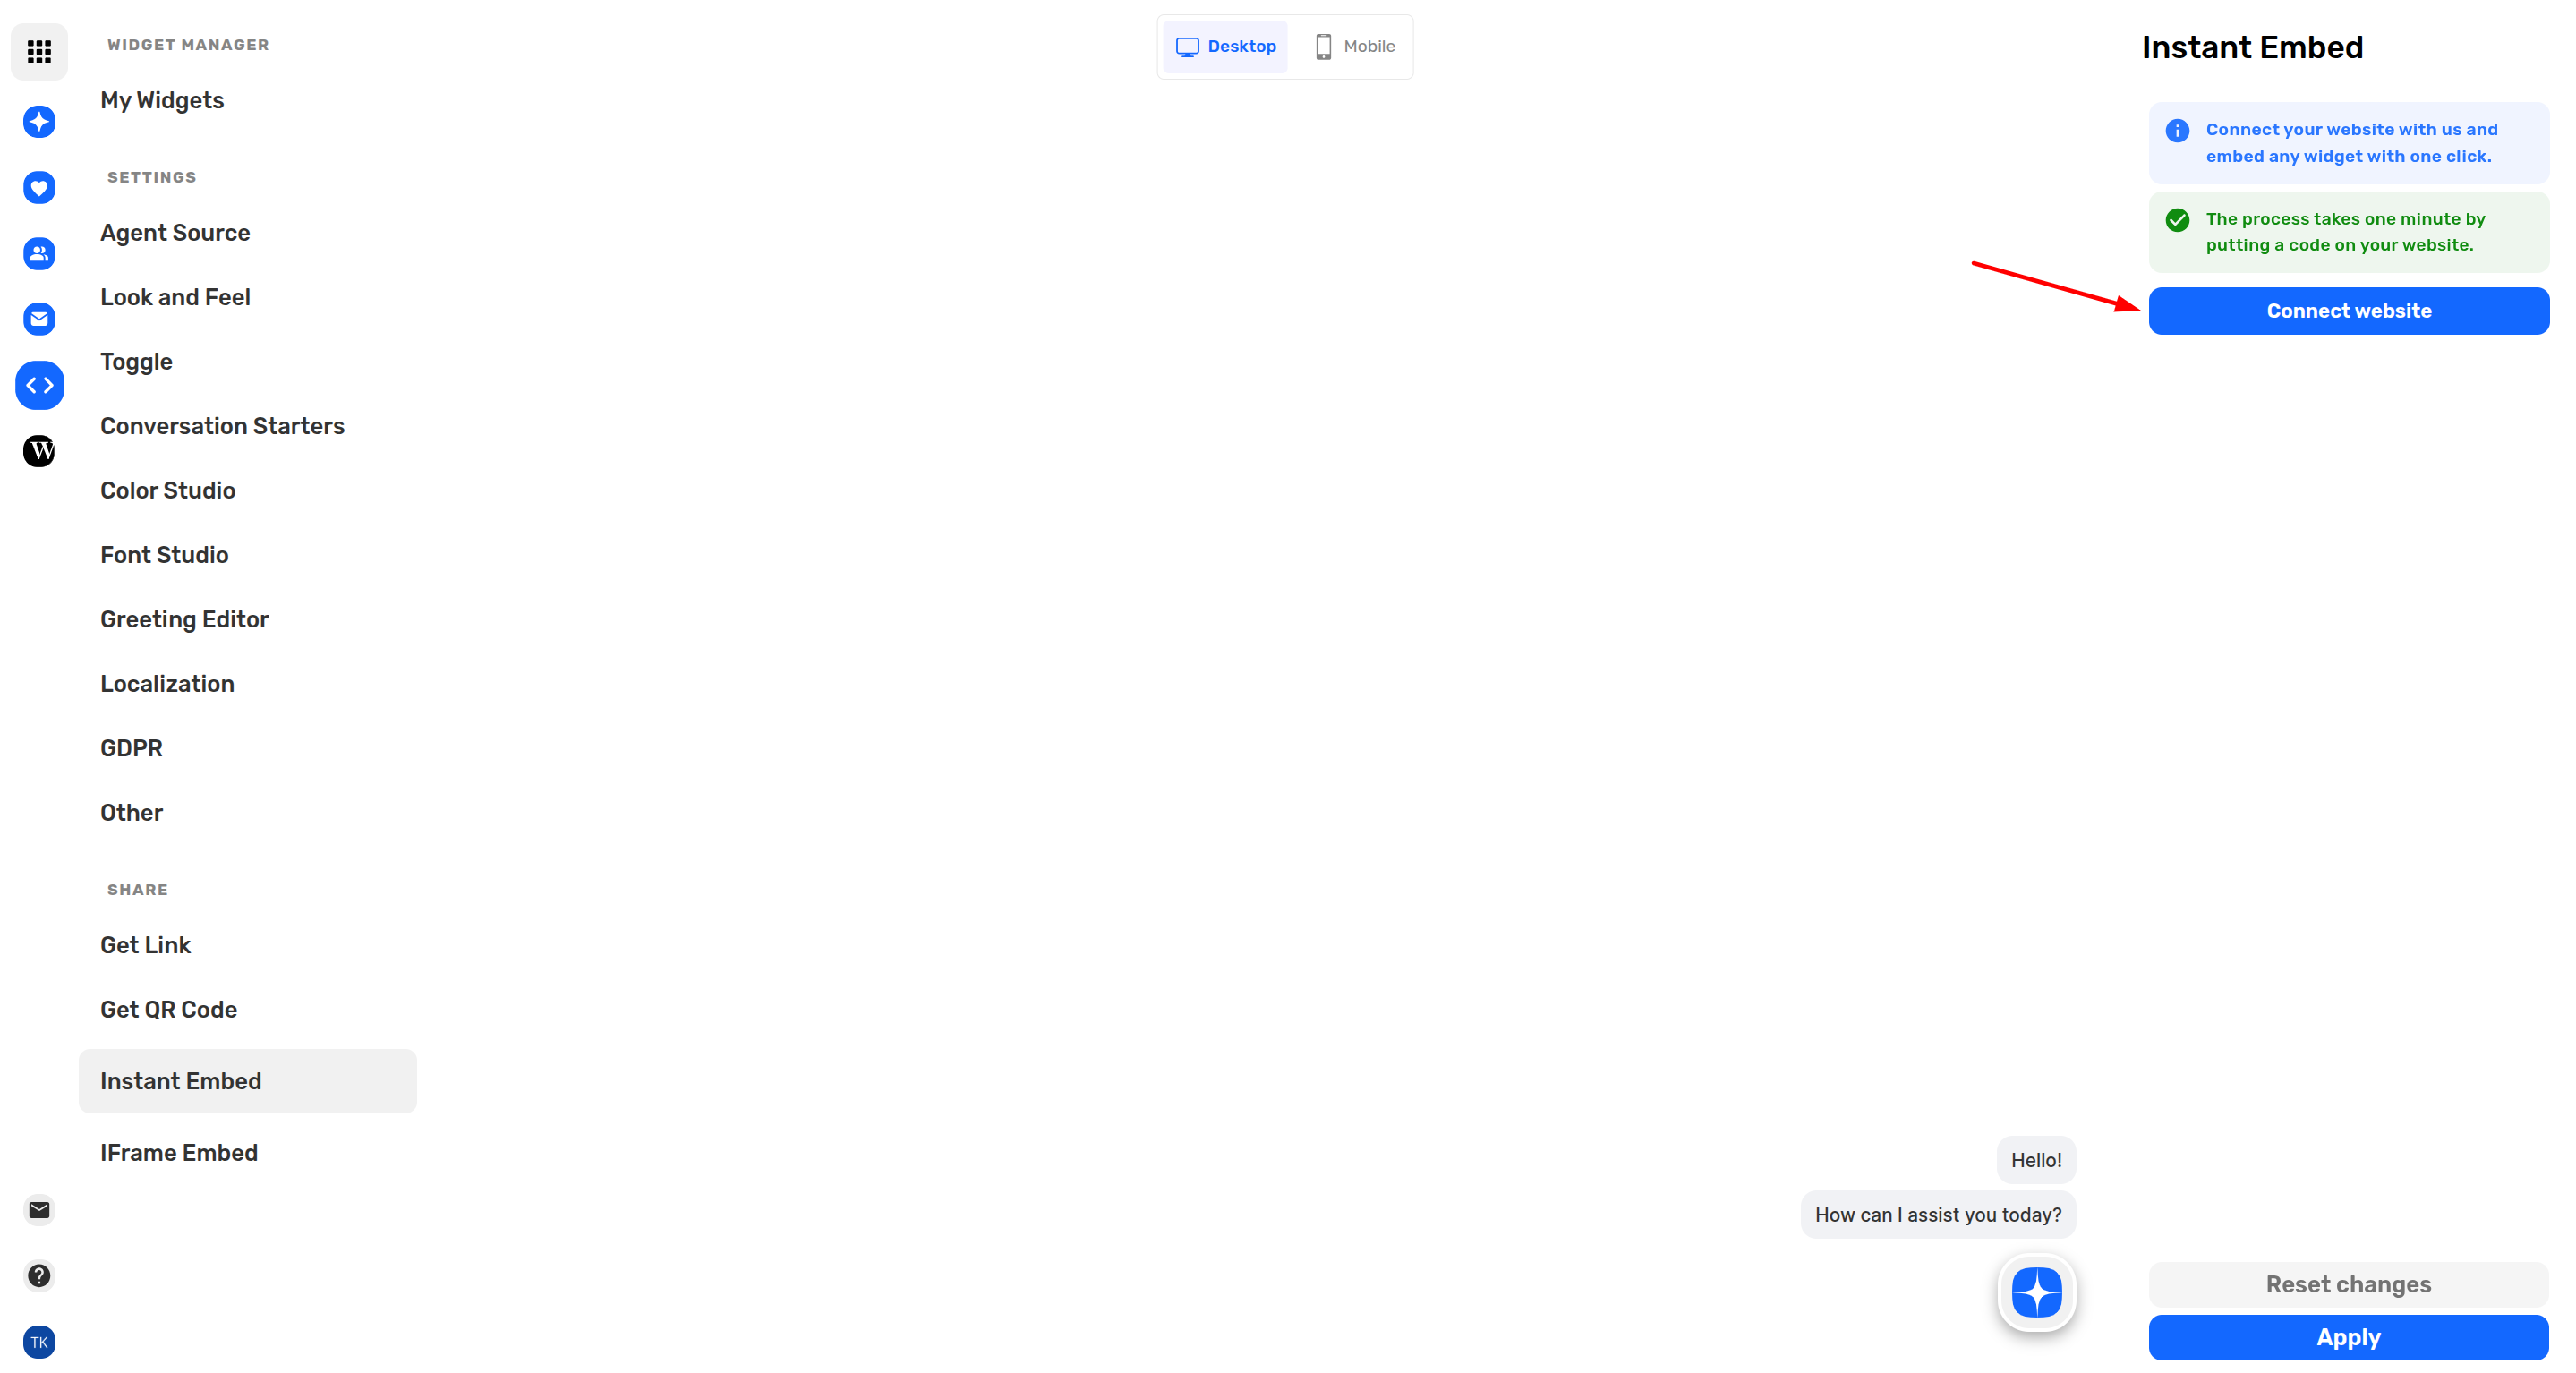
When you click connect a website you get a modal where you're asked to connect your website:
Connect a Website
Insert your website below without https and any other special characters.
www.example.comℹ️ If your website works with www then make sure you include it here too.
Once you click continue an embed code will be generated for you. Copy this script snippet to your clipboard.
2. Add Code using Webflow Custom Code Settings
Webflow allows you to inject scripts globally across all pages of your site inside your Site Settings workspace.
- Log into your Webflow Dashboard.
- Find your project card, click the three dots (...), and select Site Settings.
- In the sidebar or top tab layout menu, click on Custom Code.
- Locate the Footer Code input area field container block (this ensures it runs smoothly without blocking visual assets).
- Paste your Answerly script snippet code directly into the code editing field box.
- Click Save Changes and remember to hit Publish to push your live updates to your production domain staging links.
3. Verify the Connection
Once the code is added to Webflow, we need to establish the connection between your site and Answerly.
- Open your published Webflow live production link in a new browser tab.
- Refresh the page a few times, this triggers the script and alerts our system.
- Head back to the Answerly website dashboard.
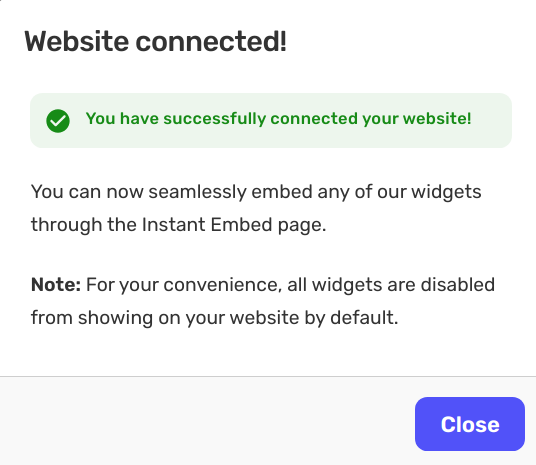
Your dashboard status will update to show that your website is successfully Verified.
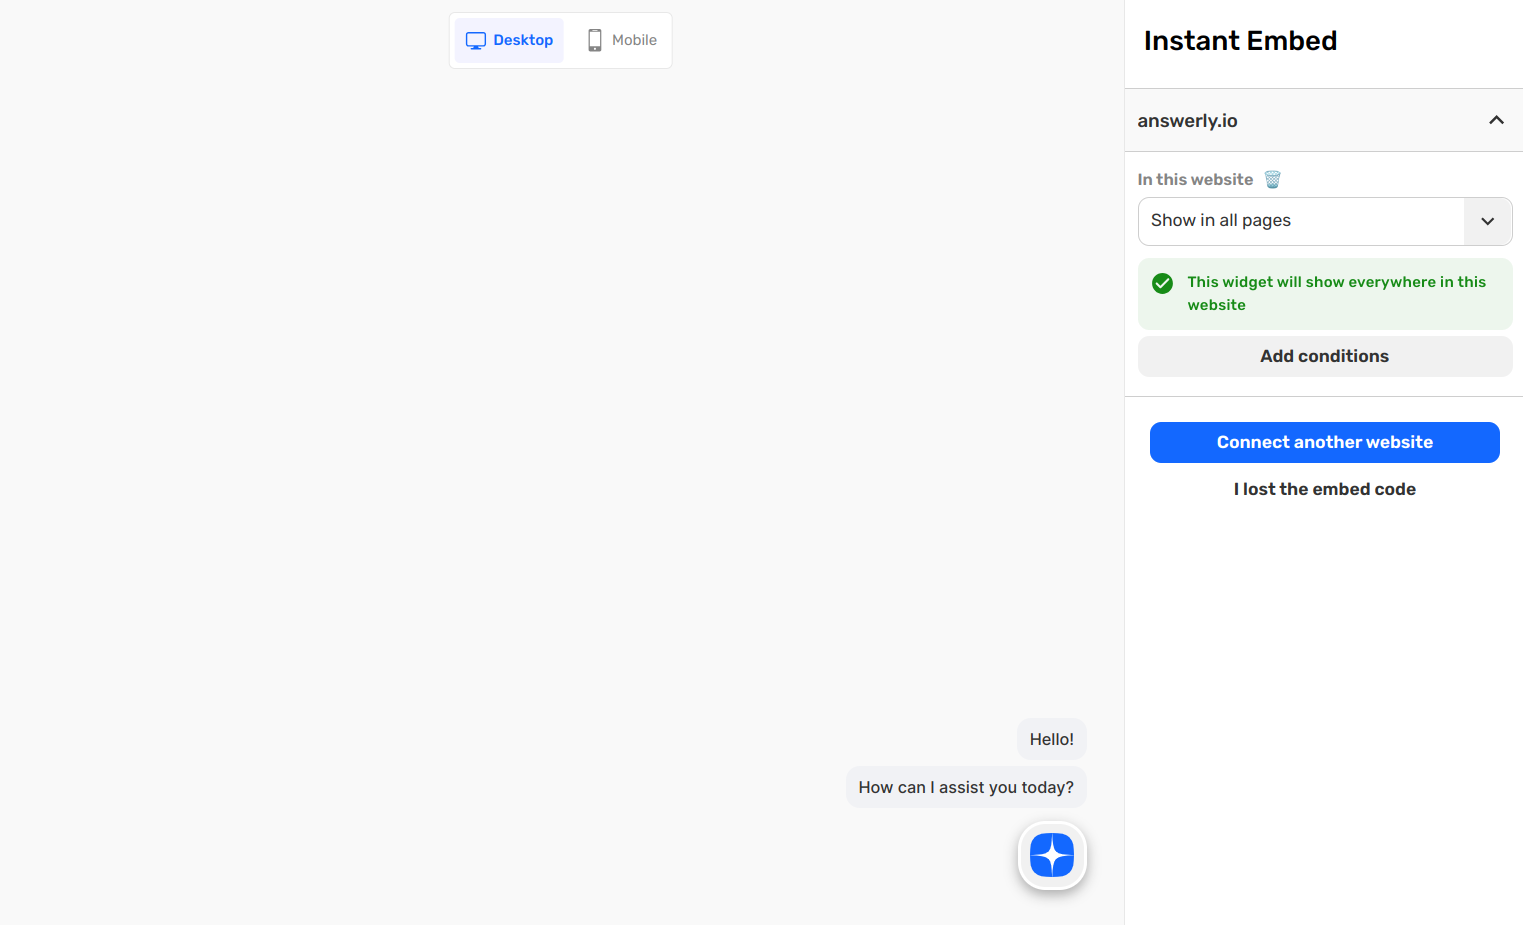
4. Set Your Display Conditions
Now that the handshake is complete, you can control exactly where your AI agent appears. In your Answerly dashboard settings, choose whether you want to show your agent across all pages, or set specific path conditions to match your preference.
Need any help?
That's it! Your AI teammate should now be live on your Webflow canvas, perfectly styled and ready to welcome your leads. If you run into any issues during the setup or the verification step won't greenlight, don't worry. Just reach out to hi@answerly.io, and our team will help you configure it in real-time.