Agent
Collecting Data

Hey there! If you're looking to gather information from your visitors, or capture leads with your AI Agent, you've come to the right place!
Collecting data is a breeze with our platform, and I'll walk you through each step. Let's get started. 😊
Step 1: Enable Data Collection
First things first, go to your agent settings by navigating to Collect Data.
Look for the "Collect Data" section and make sure to check the "Collect Data" checkbox. This will enable data collection for your agent.
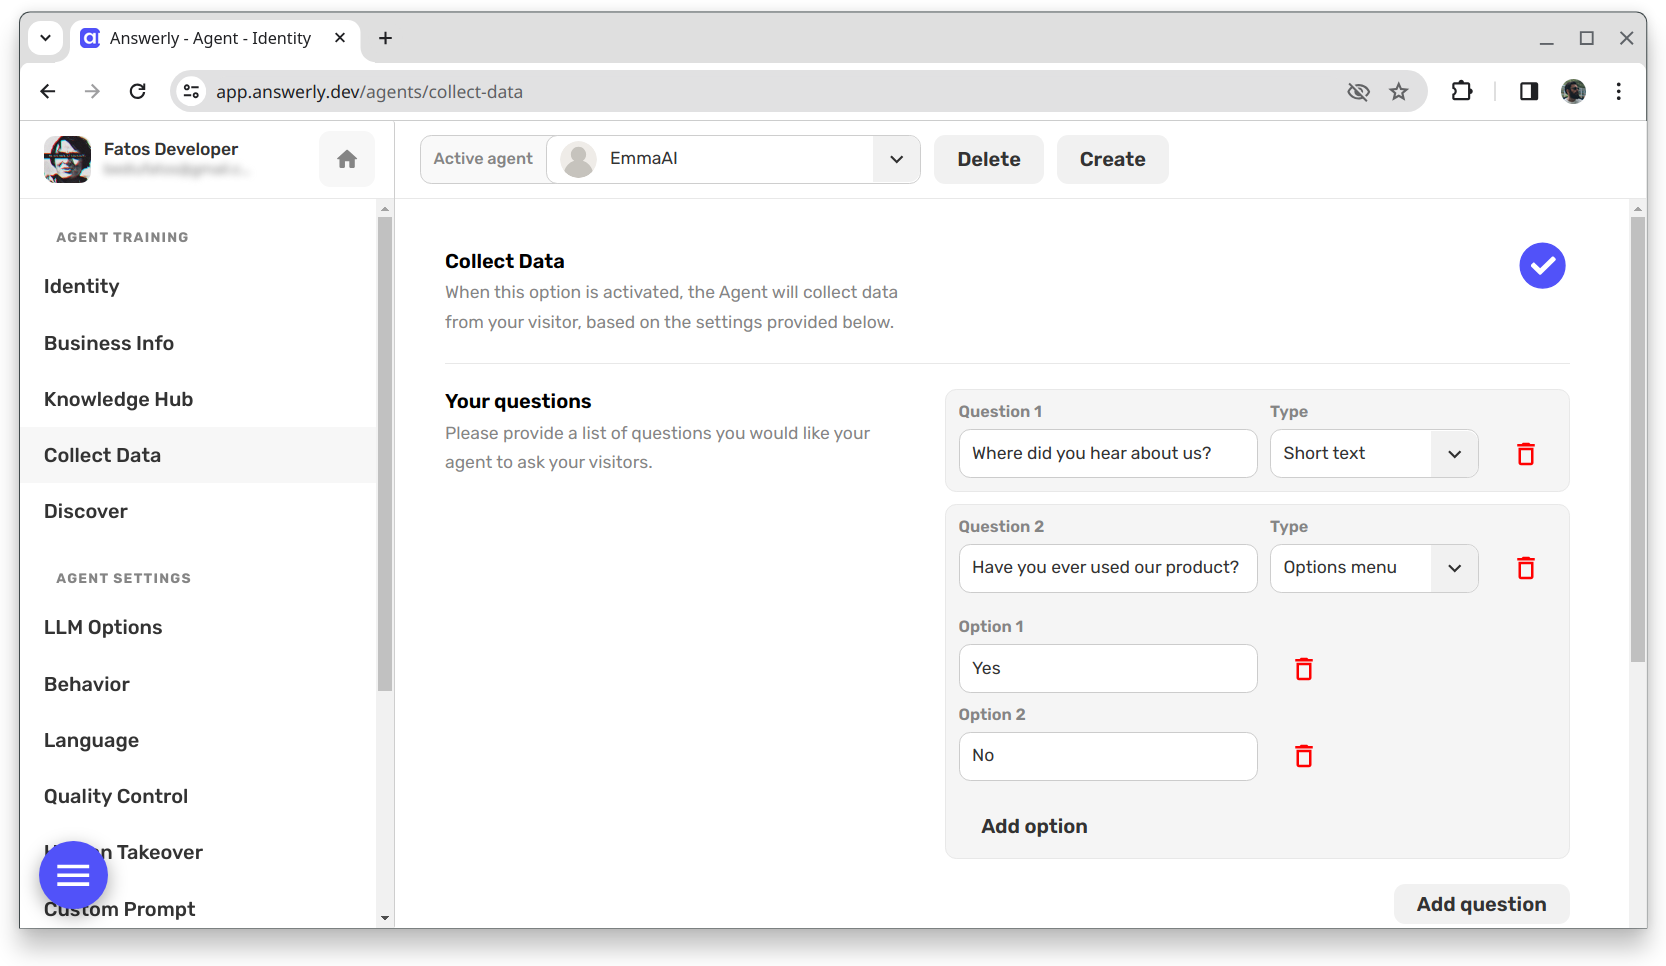
Step 2: Add Your Questions
Once you've enabled data collection, you'll see an Add Question button right below the checkbox. Click on it to start adding the questions you want to ask.

For each question, you can write your question text and choose a question type.
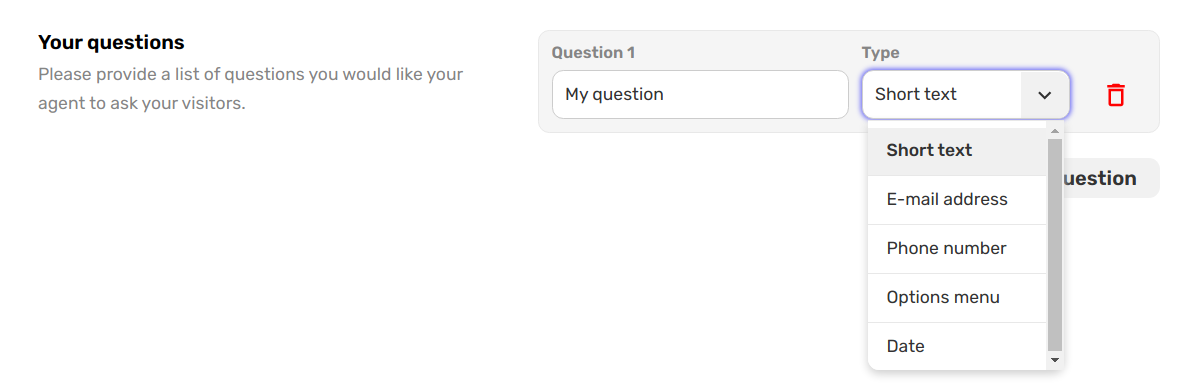
Step 2.1: Understanding Question Types
Question types instruct the AI on what information to extract from an answer, enabling your visitors to respond conversationally in their own style.
For example, the "E-mail address" type will convert the message "My email is hi at answerly dot io" to "hi@answerly.io" in your Google Sheet.
Here's an overview:
- Short Text: This type is ideal for any brief response, like names or short answers.
- Email Address: Specifically crafted to capture email addresses.
- Phone Number: Use this type to gather telephone numbers.
- Options Menu: This creates a multiple choice menu. The choices will appear in the widget as quick replies. (My favorite!)
- Date: If you need to collect dates, this type will ensure they are formatted consistently, according to your preference.
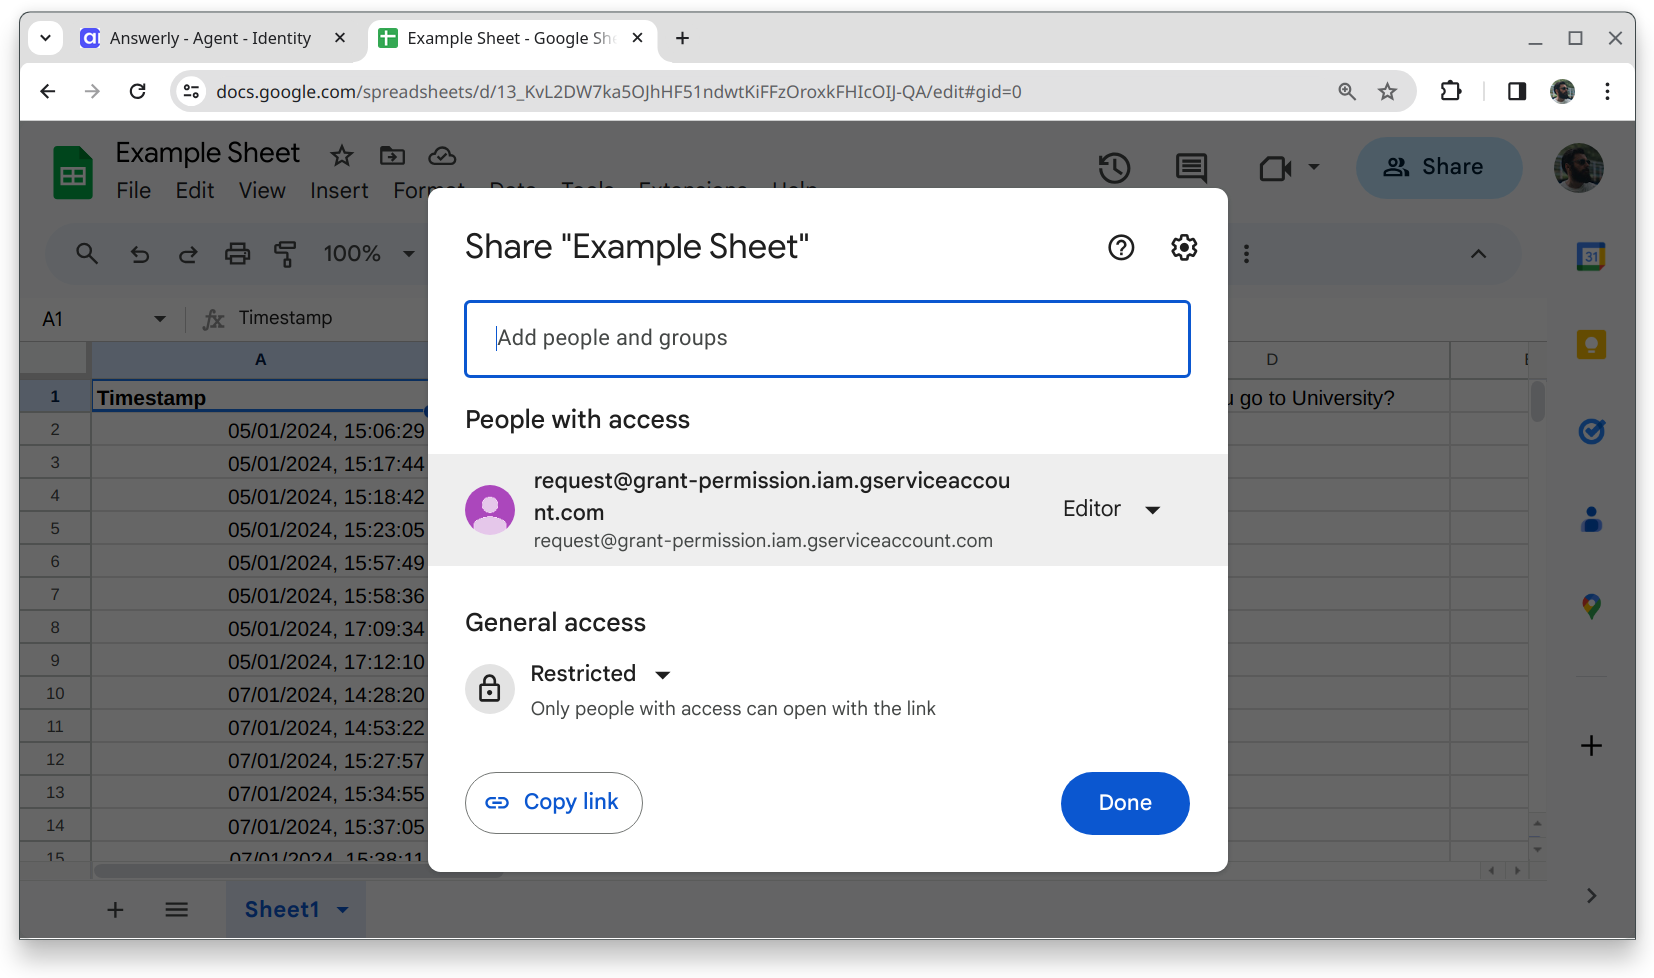
Step 3: Configure Your Google Sheet
After setting up your questions, you'll need to connect to a Google Sheet where all the collected data will be stored.
You can find the sheet field just below the questions, as seen in the picture:

- Make sure the Google Sheet you link to is empty.
- Share your Google Sheet with our service account
request@grant-permission.iam.gserviceaccount.com to grant us the necessary permissions to write data to it.
Step 4: Final Instructions (Optional)
Optionally, you can provide final instructions for what the agent should say in their last message. It's handy for wrapping up the conversation or offering a coupon code, like in the example "Suggest 50-OFF as a coupon code."

Step 5: Redirect (Optional)
Lastly, you'll find the After Collecting option. Here you can specify a URL to redirect your users to once the data collection process is complete.

And just like that, you have set up your agent to collect data! If you have any other questions or need a bit of help, don't hesitate to reach out to our support at hi@answerly.io.
Happy data gathering! 📊