The Widget
Widget Placement and Spacing

Once you have branded your widget, the next step is to decide exactly where it sits on your website and how it interacts with your page layout.
1. Positioning and Direction
You can control the widget's location to ensure it doesn't block important website elements like "Back to Top" buttons or sticky navigation:
- Placement: Toggle between Left or Right alignment. Most businesses prefer the bottom-right corner, but you can switch this depending on your site's design.
- Text Direction: Support for international audiences is built-in. You can toggle between Left to Right (standard) or Right to Left (for languages like Arabic or Hebrew).
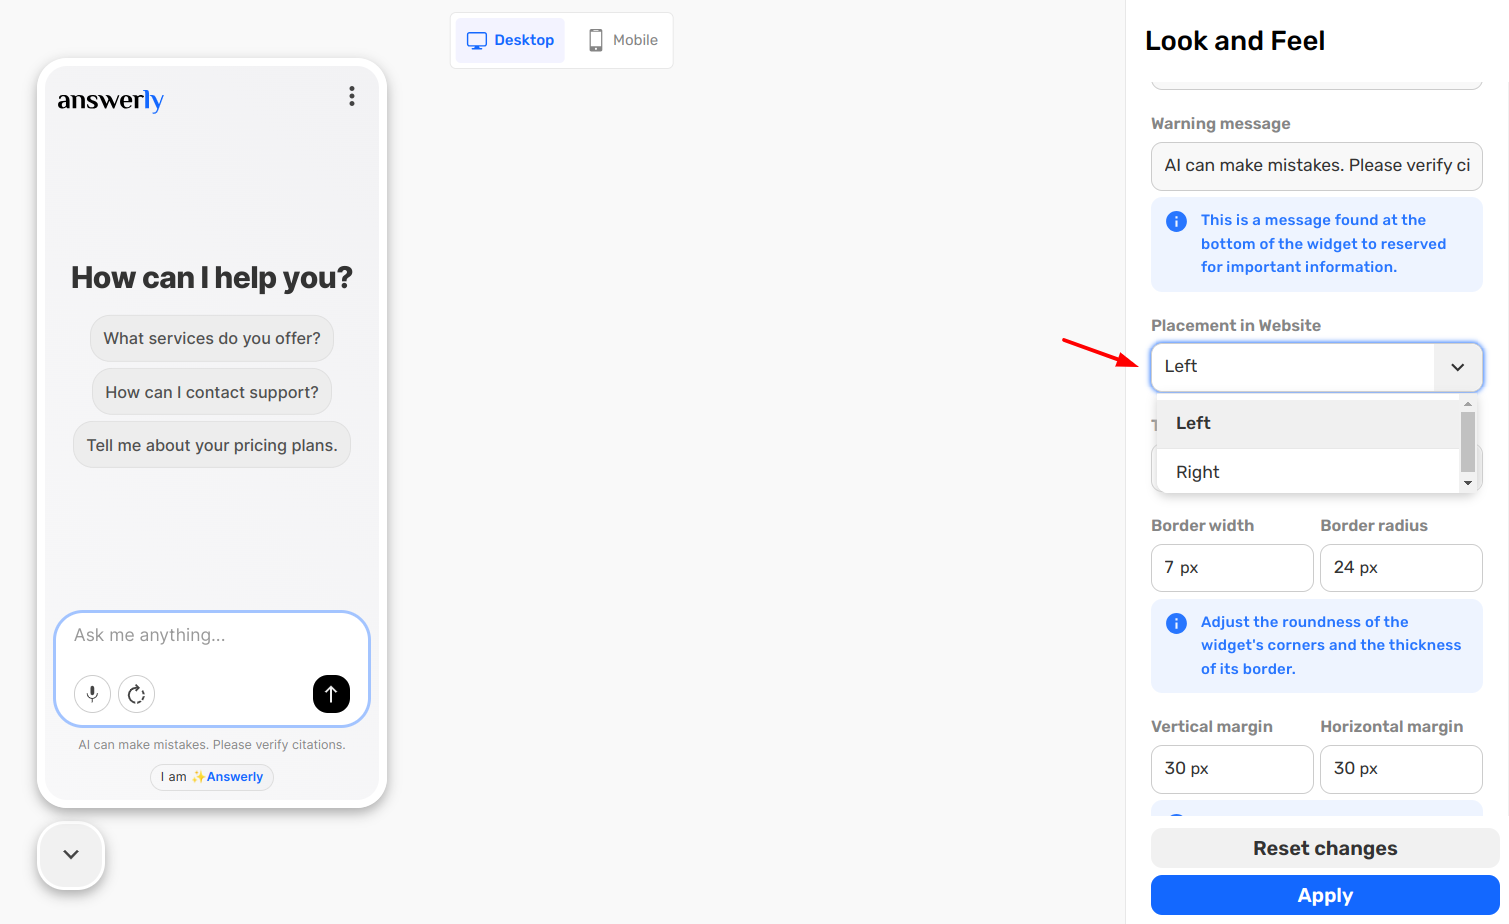
2. Fine-Tuning Margins
Sometimes the default position is too close to the edge of the screen. You can use margins to give the widget some "breathing room":
- Vertical Margin: Adjust the distance (in pixels) from the bottom of the screen.
- Horizontal Margin: Adjust the distance from the side of the screen.

3. Corner Roundness
To match the "vibe" of your website's buttons and containers, you can adjust the Border Radius. A lower pixel value creates sharp, professional corners, while a higher value creates a soft, modern, rounded look.
What’s Next?
With the layout fixed, let's customize the "Entry Point"—the button and the greeting messages that invite users to chat.