Leads & Growth
Lead Settings and Integrations

The Settings and Leads tabs are where you manage the "business logic" of your lead generation and handle the data your Agent collects.
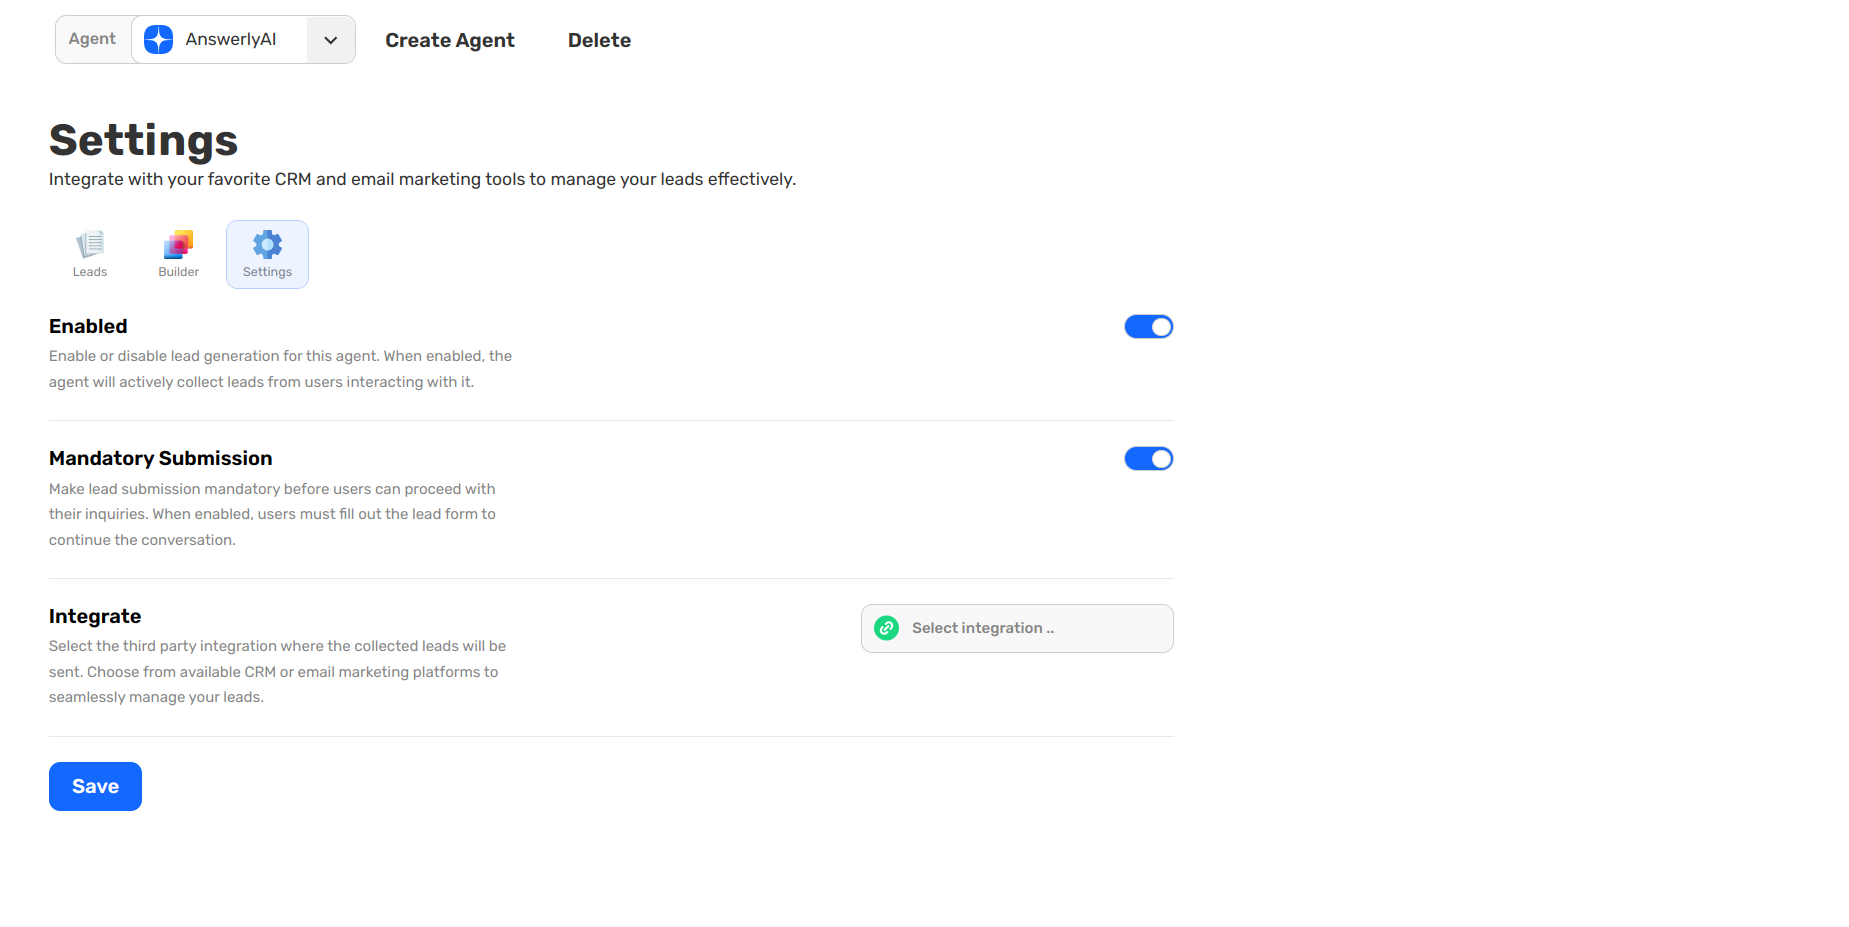
1. Configuring Lead Behavior
In the Settings tab, you have three powerful toggles to control how the Agent captures data:
- Enabled: This is the master switch. When on, your Agent will actively use the form you built.
- Mandatory Submission: When enabled, users must fill out the lead form before they can continue their inquiry. This is perfect for gating high-value information or ensuring every user is a known lead.
- Integrate: This is where you connect Answerly to your ecosystem. You can select your preferred CRM or email marketing platform to sync collected leads automatically.
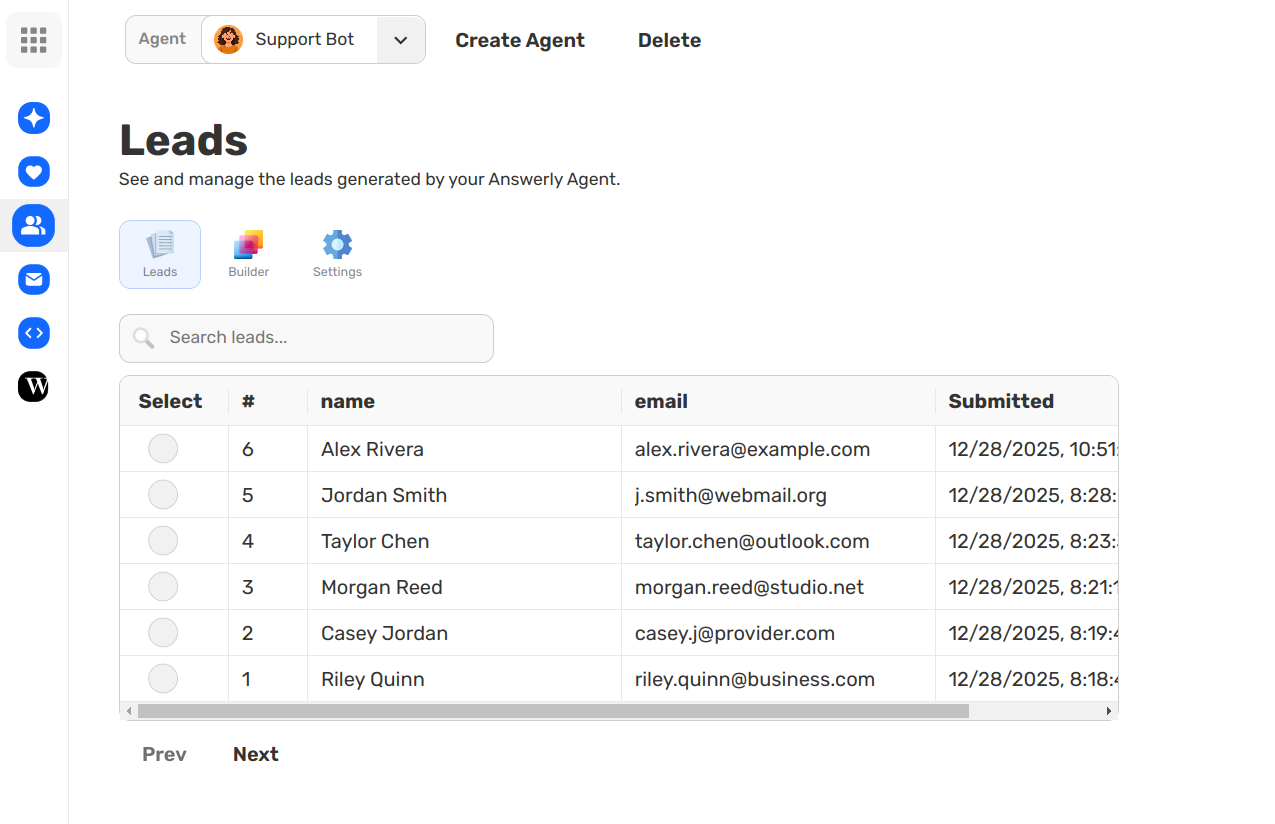
2. Managing the Leads Table
The Leads tab acts as your internal database. Every time a form is submitted, a new entry appears in the table showing:
- Lead Name & Email: The core identity of the lead.
- Submitted Date: When the interaction took place.
You can use the table to track your growth, review specific lead entries, or export the list for further manual follow-ups.
What’s Next?
Your Agent is now a trained, lead-generating machine. The final step is to customize the Widget's appearance to match your brand perfectly.