Getting Started
Capturing leads with Native Forms

Answering questions is great, but turning those visitors into customers is better. Answerly’s Native Forms allow your Agent to collect high-quality leads by embedding input fields directly into the chat interface.
1. Building the Form (The Builder)
Inside the Builder tab, you create your lead generation flow. You use a tree-style builder to add the specific questions or data points you need.
Instead of a separate pop-up, these questions appear as structured fields within the conversation. You can ask for names, emails, or specific project details, and the user can fill them out without leaving the chat.

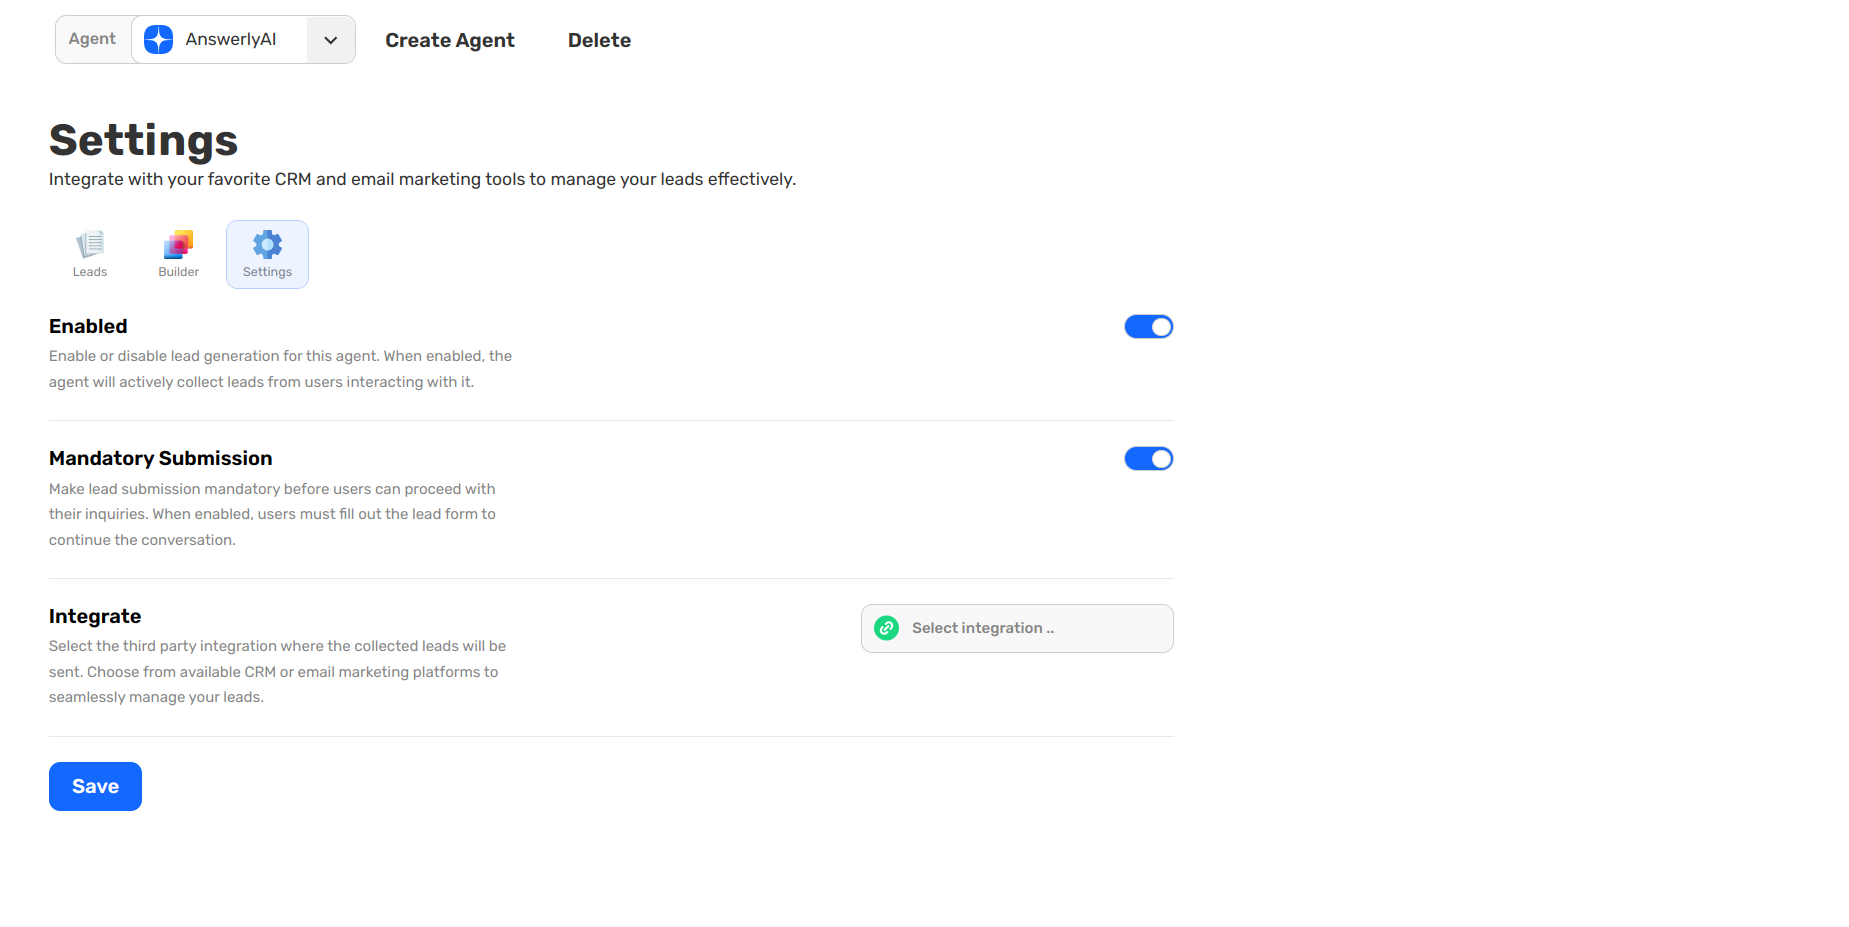
2. Configuring the Behavior (Settings)
The Settings page is where you control how and when your Agent collects lead information:
- Enable Lead Gen: Toggle this on to activate lead collection for your Agent.
- Mandatory Submission: When enabled, the Agent "gates" the conversation. Users must fill out the form fields before they can continue chatting or getting answers.
- Integrate: Connect Answerly to your CRM or email marketing tools to automatically sync every new lead your Agent captures.
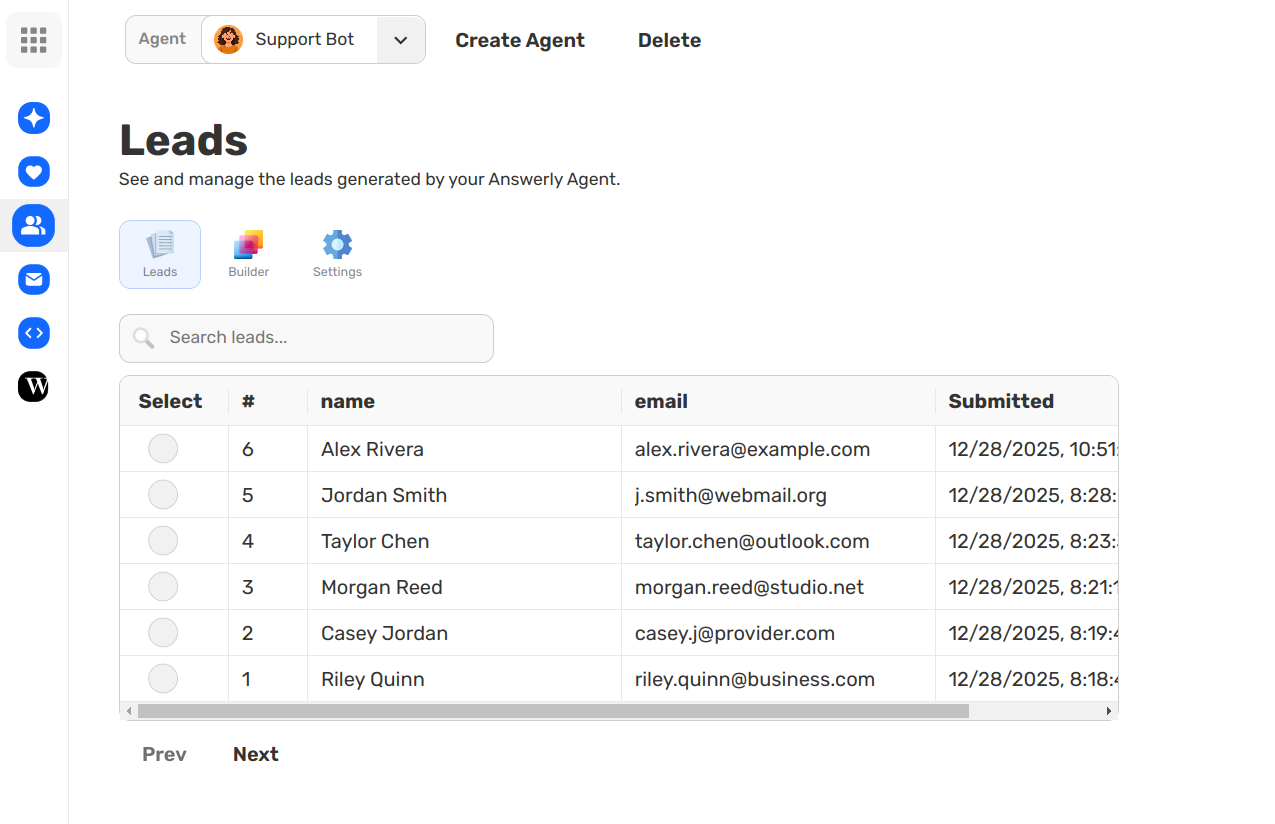
3. Managing your Leads (Leads Table)
All the information entered into your chat forms is organized in the Leads tab. The table provides a clear overview of:
- Lead Name & Email: The primary contact details captured.
- Submitted Date: A timestamp of when the lead was generated.
- Actions: Options to view the full interaction or manage the lead data.
Pro Tip: Reducing Friction
Because the form appears as a clean field inside the chat, it feels less intrusive than a traditional contact form. Use the Mandatory Submission setting if you want to ensure you capture lead data before providing specialized support or technical answers.
Congratulations! You’ve finished the Getting Started series. Your Agent is now a fully trained, lead-generating machine.