Getting Started
Embedding the widget on your website

Once your Agent is trained and ready, it’s time to go live. We use a feature called Instant Embed which lets you connect your site to Answerly with a single snippet of code.
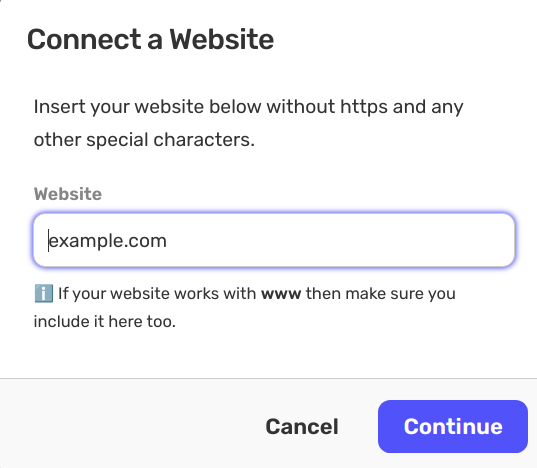
1. Connect your Website
First, you need to tell Answerly where your widget will live.
Go to the Instant Embed page and click Connect a Website. Enter your domain (e.g., example.com) and click continue.
2. Add the Code
Answerly will generate a unique code snippet for you. Copy this code and paste it into the footer or header of your website’s source code.
If you use a platform like WordPress, Webflow, or Shopify, you can usually paste this into the "Custom Code" or "Global Footer" settings.
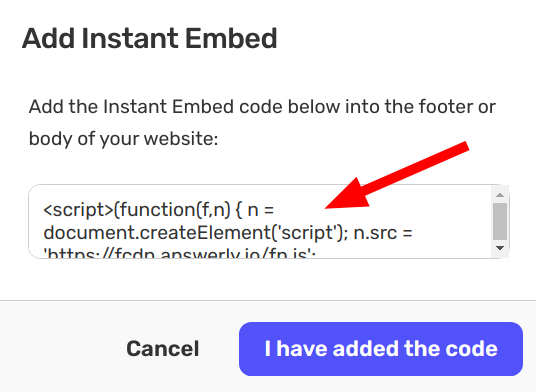
3. Verify the Connection
After you’ve pasted the code, click "I have added the code".
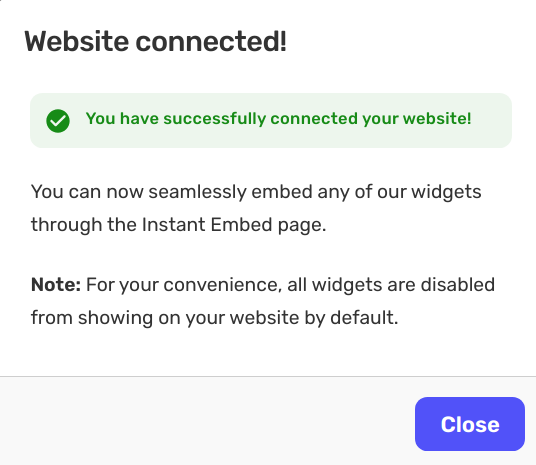
To complete the verification:
- Open your website in a new Incognito window.
- Refresh the page once or twice.
- Return to Answerly; the modal will update to show that your site is successfully verified.
4. Make it Live
Verification connects your site, but you still need to "flip the switch." On the Instant Embed page, look for your website on the right side.
Change the setting to "Show in all pages" and click Apply.
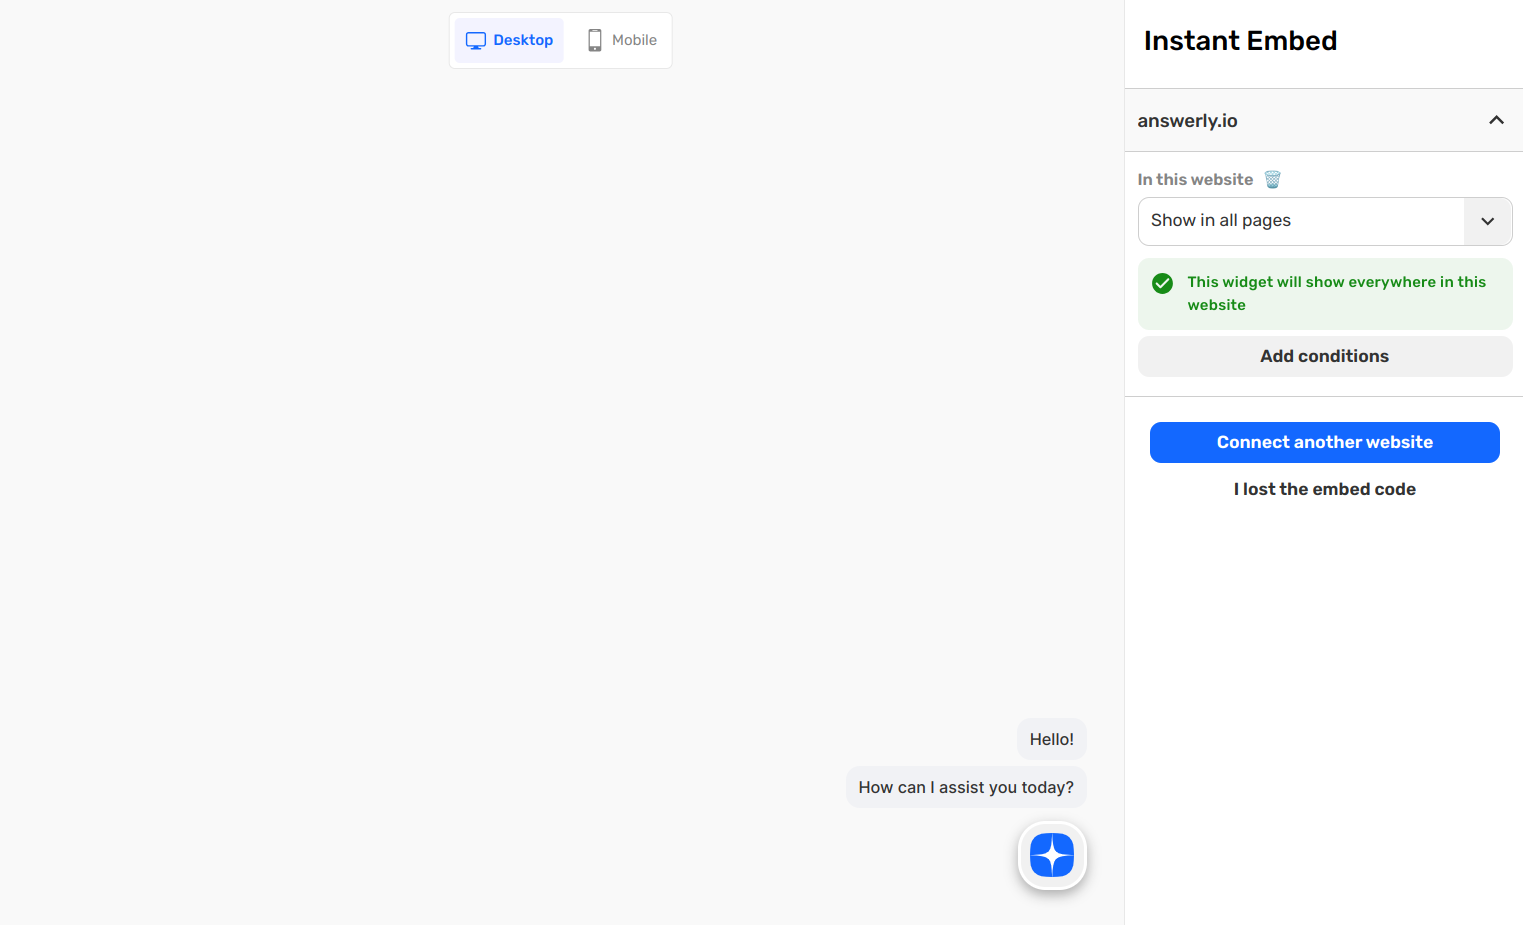
Your AI Agent is now live and ready to answer your customers!
Troubleshooting
My website won't verify?
- Try adding your website without the
wwwprefix (or vice-versa). - Clear your website's cache if you use a plugin like WP Rocket or a CDN like Cloudflare.
- Ensure the code is placed before the closing
</body>tag.
Next Step: Capturing leads with Native Forms →